 Save to Pinterest
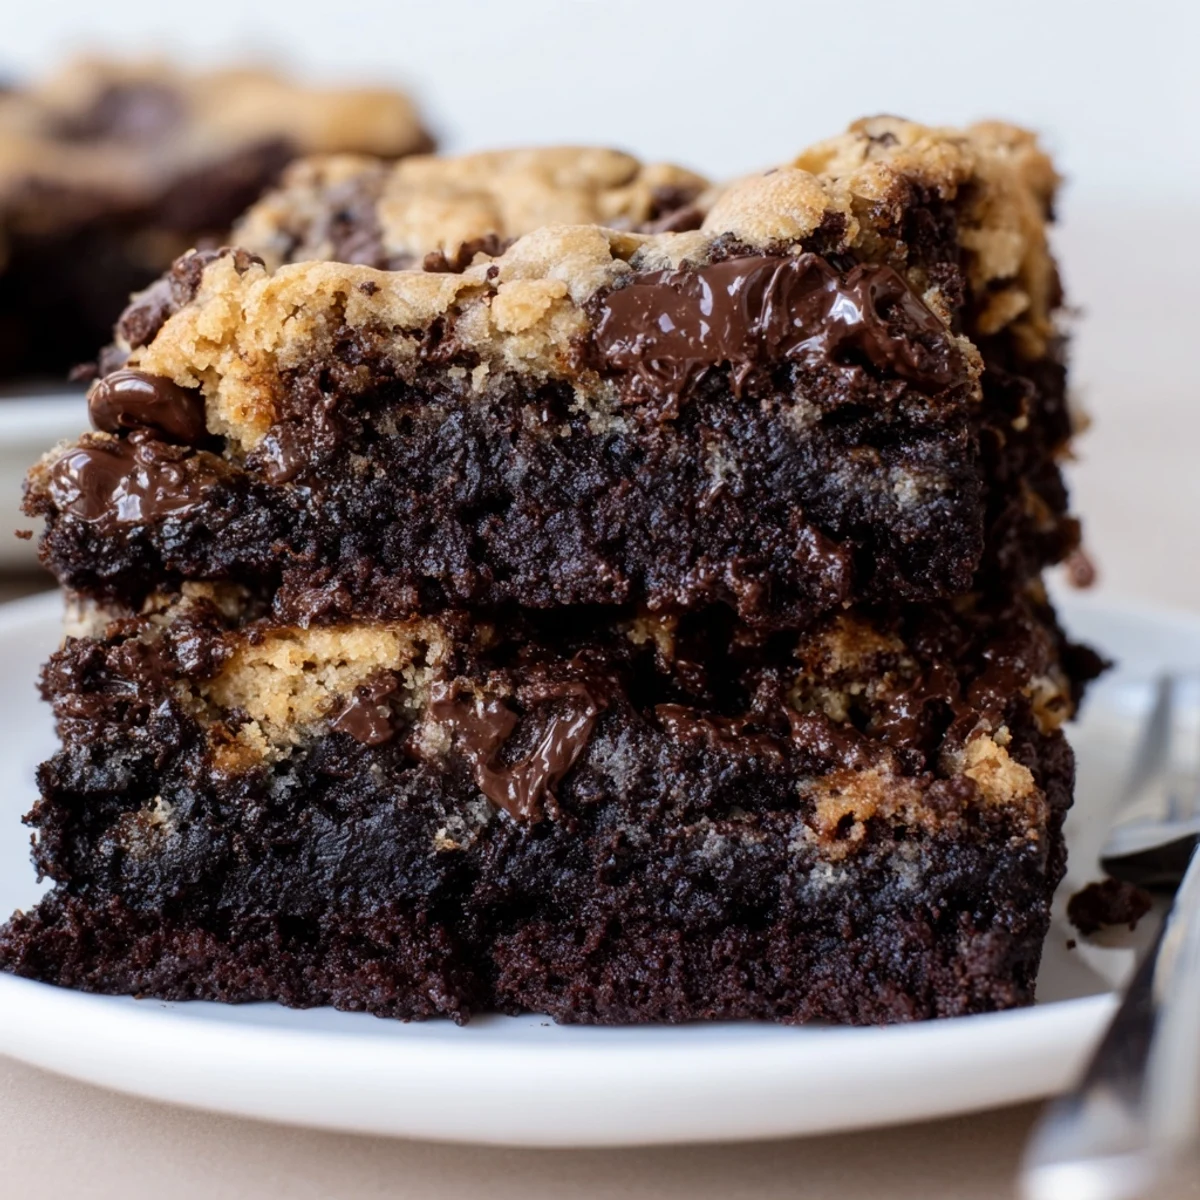
 These fudgy, chewy brookies layer a dense chocolate brownie beneath a studded chocolate-chip cookie topping for a delightful contrast of textures. Prep is about 25 minutes and baking takes 28–33 minutes in an 8×8 in pan, yielding 16 bars. For extra gooeyness, pull them slightly underbaked and chill before slicing. Variations include adding nuts or swapping chips for butterscotch; serve warm with vanilla ice cream.
The rain was hammering against the kitchen window the afternoon I stumbled into brookies, and honestly I was just trying to use up leftover brownie batter sitting in the fridge next to a half batch of cookie dough. I swirled them together on a whim, shoved the pan in the oven, and what came out thirty minutes later was nothing short of a small miracle. The edges had that crackly brownie crust while the center stayed impossibly gooey, and the cookie top had pooled into golden pockets of buttery sweetness. My roommate ate three bars standing at the counter without saying a word.
I brought a tray of these to a potluck last fall and watched a quiet crowd turn animated, everyone asking who made the chocolate thing and could they please have the recipe. One friend texted me at midnight that night saying she had already made her own batch and eaten four.
Ingredients
- Unsalted butter (115 g, melted for brownie layer and 115 g, softened for cookie layer): Using butter in both layers is nonnegotiable here, and keeping it unsalted lets you control the seasoning.
- Granulated sugar (200 g for brownies, 50 g for cookies): The larger amount in the brownie layer creates that classic shiny, crackly top crust.
- Brown sugar, packed (100 g): This brings molasses depth and chew to the cookie layer, and packing it tightly ensures you get the right density.
- Eggs (2 large for brownies, 1 large for cookies): Room temperature eggs blend more smoothly into both batters without seizing the melted butter.
- Vanilla extract (1 tsp per layer): Do not skip this in either layer, because it rounds out the cocoa and enhances the chocolate chips beautifully.
- All purpose flour (65 g for brownies, 150 g for cookies): Less flour in the brownie layer is what keeps it dense and fudgy rather than cakey.
- Unsweetened cocoa powder (30 g): This small amount delivers deep chocolate flavor without making the brownie layer dry.
- Baking soda (1/2 tsp): Only the cookie layer needs leavening, and baking soda gives those gentle lift and spread characteristics.
- Salt (1/4 tsp for brownies, 1/2 tsp for cookies): Salt is the quiet hero that makes chocolate taste more like itself in both layers.
- Chocolate chips (110 g): Semi sweet chips melt into little pools on top, and using good quality ones makes a noticeable difference.
Instructions
- Set up your baking station:
- Preheat your oven to 175 degrees C (350 degrees F) and line a 20 by 20 cm (8 by 8 inch) pan with parchment, leaving the sides hanging over like handles. This simple trick will save you from the heartbreak of brookies stuck to the pan.
- Build the brownie layer:
- In a medium bowl, whisk the melted butter and 200 g of sugar until glossy, then add two eggs and vanilla, beating until the mixture looks silky and uniform. Gently fold in the flour, cocoa, and 1/4 tsp salt just until you stop seeing dry streaks, then spread this dark, glossy batter evenly across the bottom of your prepared pan.
- Make the cookie dough:
- Beat the softened butter with brown sugar and 50 g granulated sugar until the mixture looks creamy and lighter in color, then mix in one egg and vanilla until fully incorporated. Add the flour, baking soda, and 1/2 tsp salt gradually, stirring until the dough just comes together, then fold in the chocolate chips with a few confident strokes.
- Combine the two worlds:
- Drop generous spoonfuls of cookie dough across the surface of the brownie batter and use a spatula to nudge them into a rough, even layer. Some brownie peeking through is perfectly fine and actually creates those beautiful swirled edges once baked.
- Bake until barely done:
- Slide the pan into the center of your oven and bake for 28 to 33 minutes, watching for a golden cookie top and a toothpick that emerges with a few moist crumbs clinging to it. The center should still have a slight wobble when you gently shake the pan, because it will set as it cools.
- Cool with patience:
- Let the brookies cool completely in the pan before using the parchment overhang to lift the whole slab out onto a cutting board. Slicing while warm will give you messy, crumbling squares, so resist the urge and wait.
 Save to Pinterest
 The day my niece helped me make these, she pressed her face right up to the oven door and narrated the entire baking process out loud, gasping when the cookie layer puffed and the edges turned golden. She now requests brookies for every single birthday.
The Right Pan Matters More Than You Think
Use a metal 20 by 20 cm pan if you have one, because glass pans bake slower and can leave you with an underdone center by the time the edges overbrown. Light colored metal conducts heat evenly and gives you the most consistent results across the whole pan.
Mixing By Hand Versus A Stand Mixer
Both batters come together easily with a whisk and a wooden spoon, which is how I usually make them when I am feeling lazy about dishes. A stand mixer with the paddle attachment works beautifully for the cookie layer if you want it ultra creamy, but the brownie layer should always be mixed by hand to avoid incorporating too much air.
Serving And Storing Your Brookies
Stored in an airtight container at room temperature, these bars stay wonderfully fudgy for up to four days, though they rarely last that long in my kitchen.
- Warm a bar for ten seconds in the microwave and top it with vanilla ice cream for a dessert that will ruin you for all other desserts.
- You can freeze individual bars wrapped tightly in plastic for up to three months and thaw them at room temperature when cravings strike.
- Sprinkle a tiny pinch of flaky sea salt on top right before serving to elevate the chocolate flavor in a way that surprises people every time.
 Save to Pinterest
 Every batch of brookies I make reminds me that the best recipes come from playful curiosity in the kitchen, and I hope these bars bring that same warmth and delight to your table.
Your Recipe Questions Answered
- → How do I achieve a fudgy brownie layer?
-
Use melted butter and the specified sugar-to-flour ratio, avoid overmixing once flour is added, and remove from the oven when a toothpick shows moist crumbs — residual heat finishes the set.
- → Why is the cookie layer not spreading evenly?
-
Work with spoonfuls or chilled dough: drop dollops of cookie dough and gently spread with a spatula. If dough is too soft, chill briefly so it holds shape and spreads without sinking into the brownie.
- → How can I tell when brookies are done?
-
The cookie layer should be golden and a toothpick into the center should come out with a few moist crumbs. Avoid a completely dry skewer to keep the center fudgy.
- → What’s the best way to store and reheat them?
-
Store cooled bars in an airtight container at room temperature for up to 3 days or refrigerate up to 5 days. Reheat gently in a low oven or microwave briefly to restore a warm, gooey texture.
- → What variations work well in these bars?
-
Fold chopped nuts into either layer, swap chocolate chips for butterscotch or white chocolate, or swirl caramel between layers for extra richness.
- → Can I make allergy-friendly substitutions?
-
Replace the egg with a flax or chia egg, use dairy-free margarine, and substitute a gluten-free all-purpose flour blend. Check chocolate chip labels for soy or milk if avoiding allergens.
