 Save to Pinterest
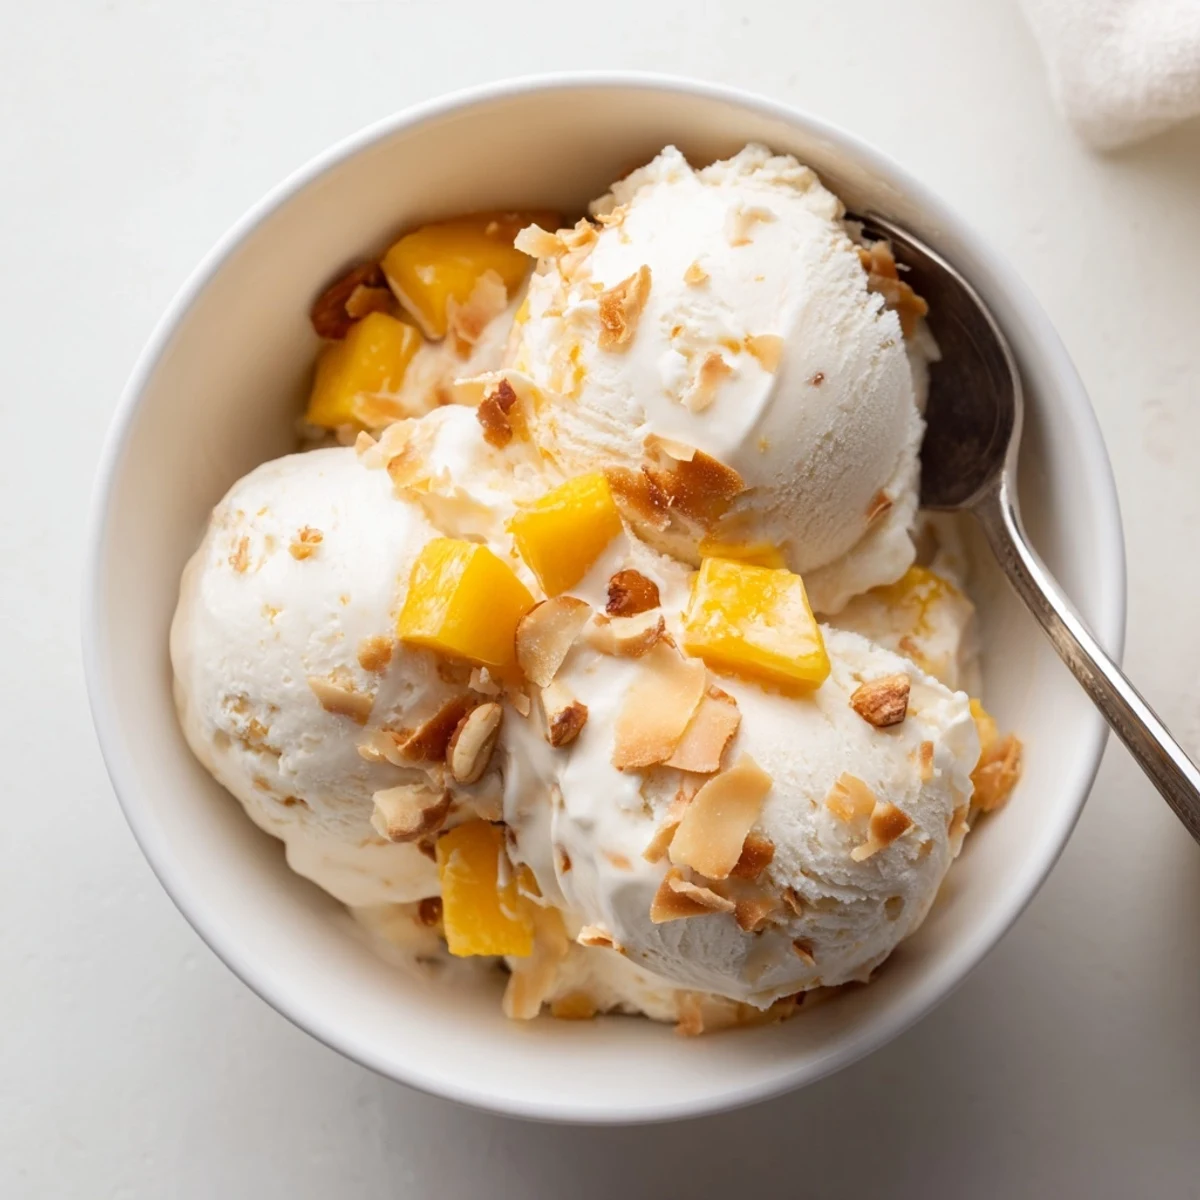
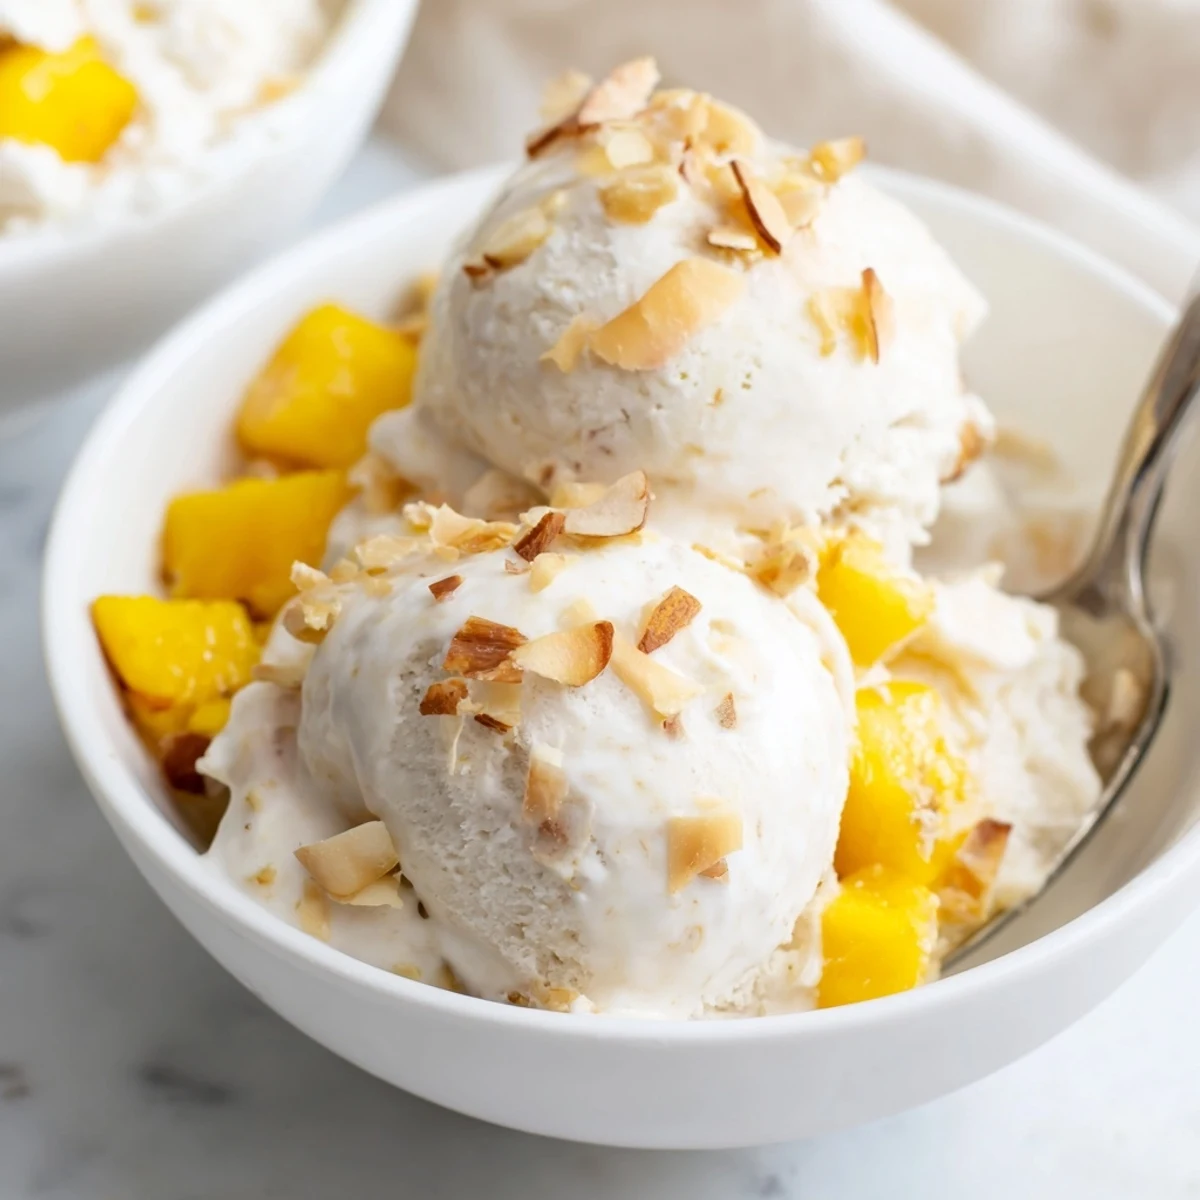
 Create this luscious Thai-inspired frozen dessert combining full-fat coconut milk and cream for an incredibly creamy texture. Sweeten with sugar and enhance with pure vanilla extract for a balanced tropical flavor. Chill the base thoroughly before churning to achieve the smoothest consistency. Customizable with toasted coconut flakes, roasted peanuts, or fresh mango chunks for added texture and authenticity.
This vegan treat requires just 15 minutes of active preparation before your freezer does the work. The result is a rich, dairy-free indulgence that captures the essence of Thai street desserts while remaining naturally gluten-free and suitable for various dietary preferences.
The first time I tasted coconut ice cream in Bangkok, it was from a street vendor who served it in a halved coconut shell. I spent the rest of that trip obsessively trying to recreate that impossibly creamy texture at home, ruining three batches before finally understanding that patience is actually an ingredient.
Last summer I made this for a dinner party where two guests were vegan and another was lactose intolerant. Watching everyone go silent for that first bite, then immediately ask for seconds, made me realize this wasnt just a good alternative to dairy ice cream.
Ingredients
- Fullfat coconut milk: This creates the base structure and I learned to shake the can well before opening to incorporate any separated cream
- Coconut cream: The secret weapon that makes each scoop feel luxuriously rich
- Granulated sugar: I tried honey once and it threw off the freezing completely so stick with regular sugar
- Fine sea salt: Just a pinch makes all that coconut flavor really sing
- Pure vanilla extract: This bridges the gap between tropical and comforting
Instructions
- Warm the coconut base:
- Combine everything except vanilla in your saucepan over medium heat, stirring until the sugar completely disappears into the coconut milk. Watch closely and remove it the moment you see steam rising.
- Add the vanilla:
- Pull it off the heat and stir in the vanilla extract while the mixture is still warm so it infuses properly.
- Chill thoroughly:
- Let it cool completely on the counter first, then refrigerate for at least two hours or overnight if you can plan ahead.
- Churn to perfection:
- Pour it into your ice cream maker and let it run for 20 to 25 minutes until it looks like soft serve.
- Add your mixins:
- Fold in toasted coconut, chopped peanuts, or diced mango right at the end so they stay suspended throughout.
- Freeze until firm:
- Transfer to your freezer container and let it set for at least two hours before serving.
 Save to Pinterest
 My niece now requests this for every birthday instead of cake, and I keep thinking about how the simplest ingredients can create the most lasting memories.
Getting The Right Texture
The difference between good and great coconut ice cream comes down to fat content. I accidentally bought light coconut milk once and ended up with something closer to granita than ice cream. Always grab the fullfat cans and check that coconut cream is listed near the top of the ingredients.
Flavor Variations
Sometimes I add a drop of pandan extract when I want to feel transported back to those Bangkok streets. Other times a swirl of raspberry sauce running through it makes for the most beautiful presentation. The base is neutral enough to play with.
Serving Suggestions
Ten minutes on the counter before scooping makes all the difference between wrestling with a frozen block and serving perfect rounds. I love it alongside warm mango sticky rice or simply topped with more toasted coconut for crunch.
- Use a warm ice cream scoop for easier portioning
- Keep some toasted coconut flakes handy for texture contrast
- Store in the back of the freezer where temperature stays most consistent
 Save to Pinterest
 There is something deeply satisfying about scooping this into bowls and watching eyes light up, knowing it came from nothing but coconut and a little care.
Your Recipe Questions Answered
- → Is Thai coconut milk ice cream vegan?
-
Yes, this frozen dessert is completely vegan as it uses only coconut milk, coconut cream, sugar, vanilla, and salt. All optional mix-ins like toasted coconut, mango, and peanuts are also plant-based, making it suitable for dairy-free and vegan diets.
- → Can I make this without an ice cream maker?
-
Absolutely. Pour the chilled mixture into a shallow freezer-safe dish and freeze. Stir every 30 minutes for 3 hours to break up ice crystals. This manual method creates a slightly different texture but still delivers delicious creamy results.
- → How long does homemade coconut ice cream last?
-
Properly stored in an airtight container, this frozen treat maintains best quality for 1-2 weeks. For optimal texture and flavor, consume within the first week. Some ice crystals may form over time, but a few minutes at room temperature before serving restores creaminess.
- → Why is my coconut ice cream icy instead of creamy?
-
Icy texture usually results from insufficient fat content or inadequate churning. Ensure you're using full-fat coconut milk and cream, not light versions. Also, chill the base completely before freezing and churn for the full recommended time. Adding a tablespoon of cornstarch or arrowroot powder can also improve texture.
- → What toppings pair well with Thai coconut ice cream?
-
Traditional garnishes include toasted coconut flakes, crushed roasted peanuts, and fresh diced mango. For an authentic experience, serve alongside sticky rice. Other excellent toppings include toasted sesame seeds, fresh tropical fruits like pineapple or papaya, or a drizzle of coconut caramel sauce.
- → Can I reduce the sugar in this recipe?
-
You can reduce sugar slightly, but keep in mind that sugar not only sweetens but also affects freezing point and texture. Reducing sugar by more than 25% may result in a harder, icier final product. Liquid sweeteners like maple syrup or agave work but may alter the freezing consistency slightly.
