 Save to Pinterest
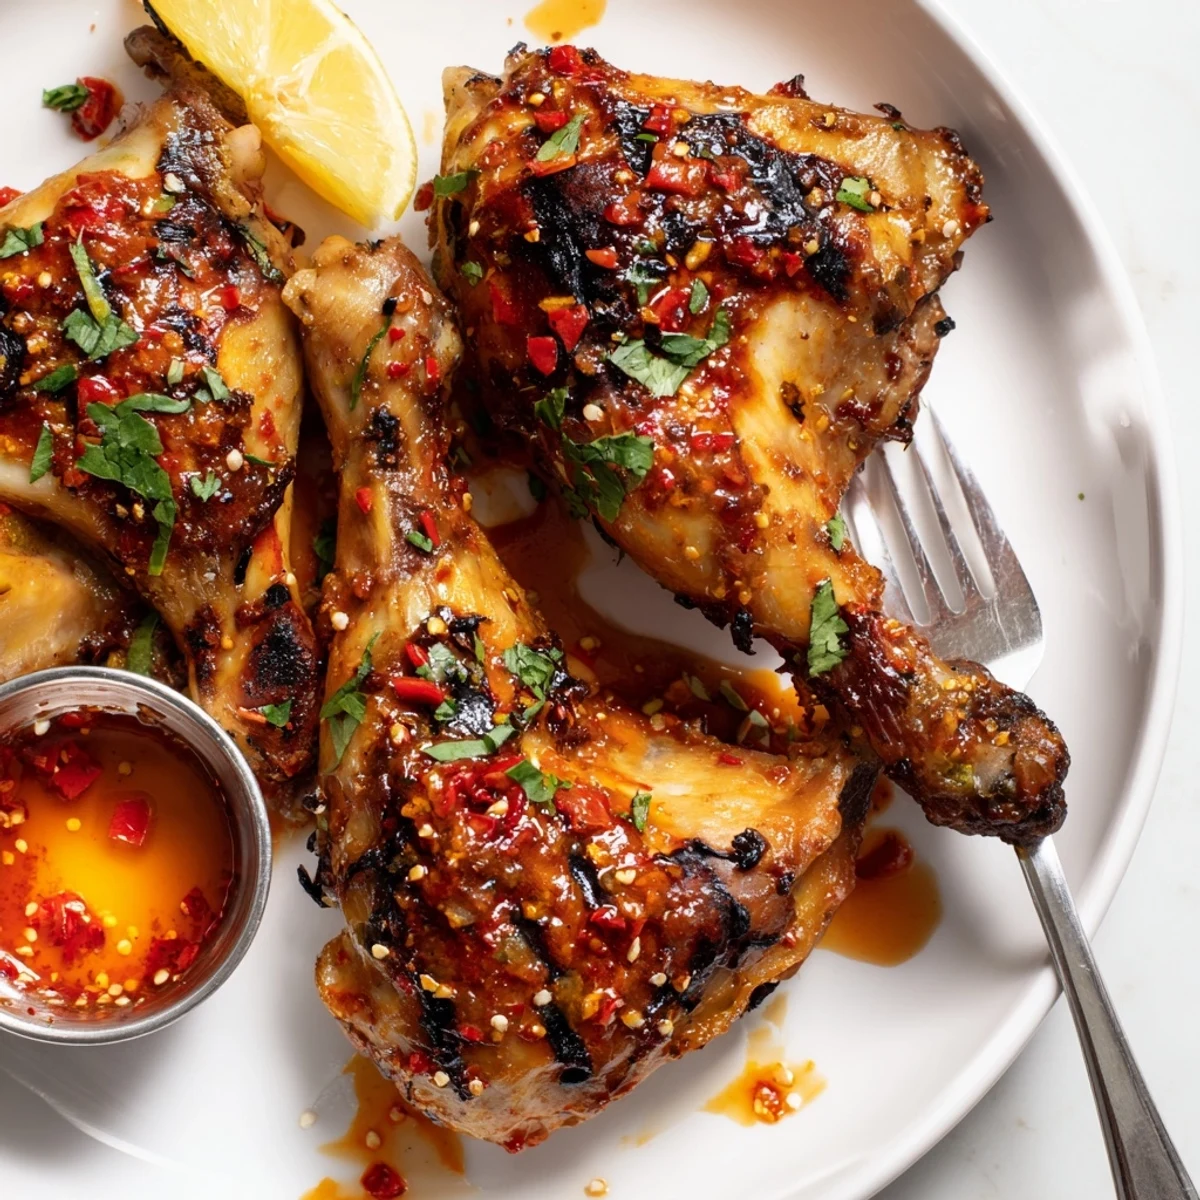
 Succulent chicken pieces are coated in a vibrant Peri Peri marinade—fresh red chiles, garlic, red pepper, lemon, olive oil, smoked paprika and oregano—then chilled for at least 3 hours to deepen flavor. Grill over medium-high heat until skin crisps, or roast at 200°C (400°F) until cooked through. Rest briefly, garnish with herbs and lemon wedges, and serve hot for a spicy, smoky centerpiece that feeds four.
Whenever I hear the sizzle of marinated chicken hitting a hot grill, my mind goes straight to Peri Peri Chicken. That intoxicating aroma, smoky with a bright peppery edge, once drew my curious neighbor to lean over the fence and ask what on earth I was cooking. It’s not a dish you can make in silence – between the vibrant sauce, lively colors, and inevitable happy chatter, it turns any kitchen into a buzzing celebration. There’s a certain kind of joy in handling the glossy, chili-flecked marinade, resisting the urge to taste before it's even hit the heat.
I distinctly remember flamboyantly basting chicken pieces with extra marinade one summer night, only to splash my apron more than the meat. My partner stood by with lemon wedges, laughing and shooing away the stray cats drawn in by the scent. The grill kept flaring up, which turned the skin especially crisp and golden. Everyone’s fingers were sticky with sauce as we dove in straight from the tray, standing around in the fading light.
Ingredients
- Chicken (1.5 kg, about 3.3 lbs): I prefer a mix of legs and thighs for juicy results after grilling, but you could use a whole cut-up chicken for variety and rich flavor – just don’t skip patting each piece dry for crispy skin.
- Fresh red chili peppers (4, bird’s eye preferred): These fiery little chilis are the heart of Peri Peri, though milder peppers can be swapped for a gentler burn – always taste as you go.
- Garlic cloves (4): I crush these roughly before adding to the blender, which brings out more bite and fragrance in the final sauce.
- Red bell pepper (1, roughly chopped): This adds sweetness and depth, making the heat friendlier for everyone.
- Small onion (1, roughly chopped): Don’t be shy about leaving it chunky – it’ll blend smooth and mellow nicely when cooked.
- Olive oil (3 tbsp): It’s what carries all those spices into every nook of the chicken and helps create that flavorful crust.
- Red wine vinegar (2 tbsp): A splash brightens the sauce; white vinegar works in a pinch but red wine vinegar adds subtle fruitiness.
- Lemon juice (from 1 lemon): Always use fresh – bottled juice won’t give the same zing or aroma.
- Smoked paprika (1 tsp): This transforms the sauce from spicy to smoky-spicy, and a little goes a long way.
- Dried oregano (1 tsp): Rubbing it between your palms before adding releases even more flavor.
- Salt (1 tsp) & Black pepper (1/2 tsp): These essentials sharpen all the other flavors; don’t skip the black pepper even if the chilis are hot.
- Sugar (1 tsp): Just enough to balance the acidity – but I’ve skipped it in a pinch if the bell pepper is super sweet.
- Fresh coriander or parsley (chopped, for garnish): Either works for a hit of cooling freshness when serving.
- Lemon wedges (optional): A squeeze right before eating will lift every bite.
Instructions
- Blend the Marinade:
- Toss the chili peppers, garlic, bell pepper, onion, olive oil, red wine vinegar, lemon juice, smoked paprika, oregano, salt, pepper, and sugar into a blender. Pulse until everything is silky and fiery-scarlet, pausing to inhale the sharp, tangy aroma.
- Marinate the Chicken:
- Pat the chicken pieces dry – this step is messier than you expect, but so important for the crispy finish. Pour most of the marinade over the chicken in a bowl or bag, tossing to coat with your hands or a spoon, then cover and chill for at least 3 hours or overnight.
- Preheat and Prep:
- Fire up your grill to medium-high or set your oven to 200°C (400°F), dreaming of charred skin and juicy bites. If you’re using an oven, set a rack over a baking tray to catch drips.
- Grill or Roast:
- Lay the chicken out (skin side up for max crispiness) over indirect heat or on the rack, basting with any reserved marinade. Turn the pieces now and then for 35-40 minutes, listening for spits and sizzles until the skin blisters and the inside runs clear.
- Rest and Serve:
- Let the chicken rest for five minutes – it builds anticipation! Sprinkle over fresh coriander or parsley, pile on a plate, and pass around lemon wedges for an extra burst.
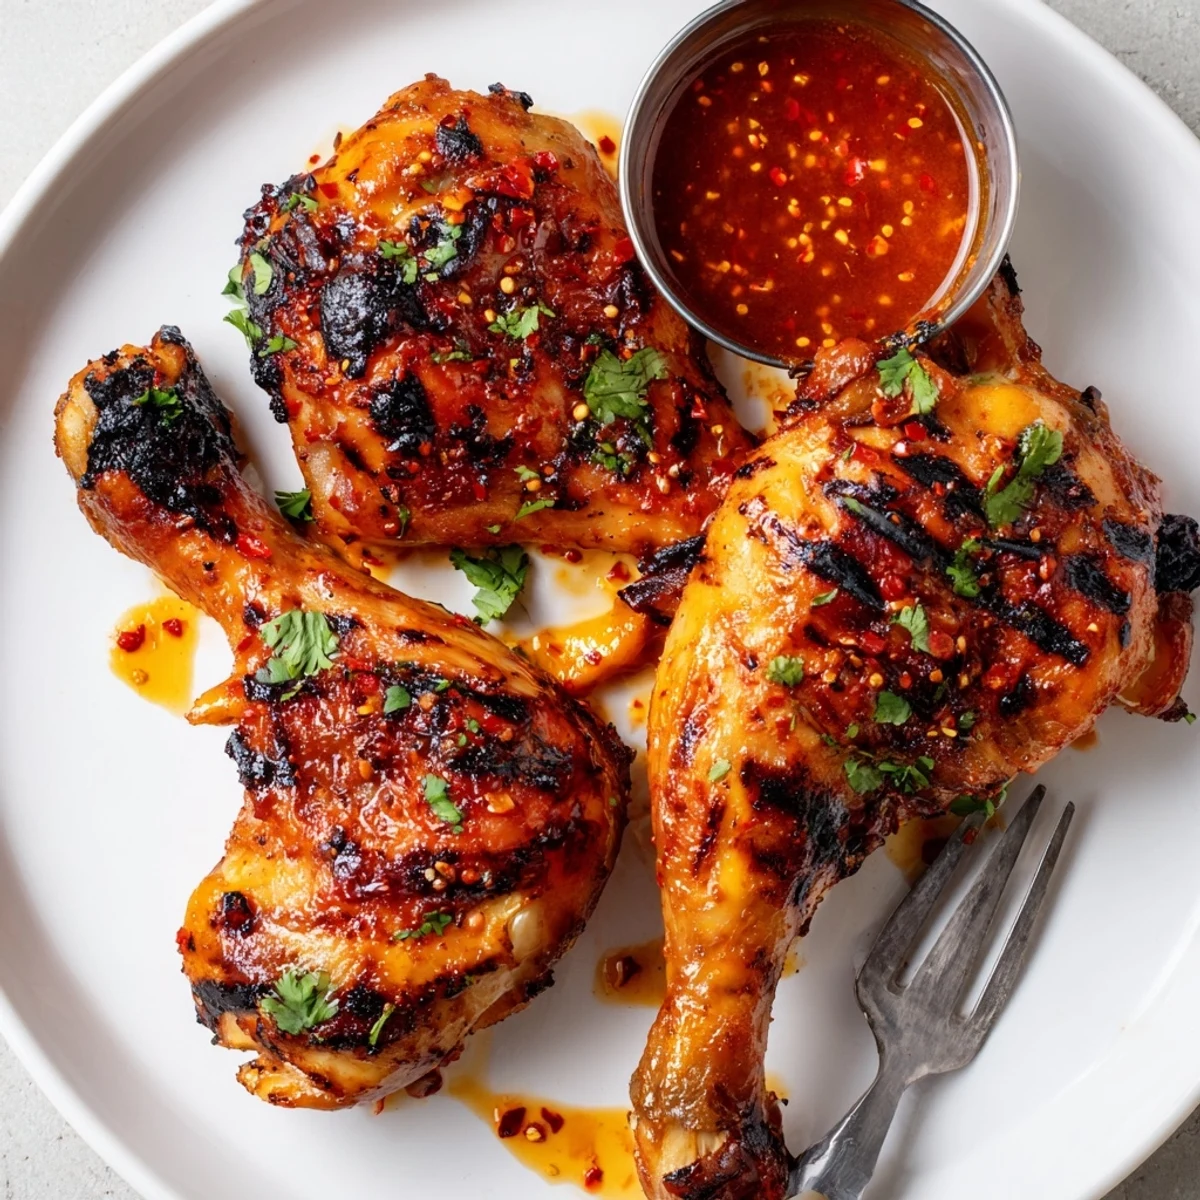 Save to Pinterest
 Once, a friend showed up unexpectedly with a bottle of chilled Sauvignon Blanc just as I was pulling the chicken off the grill. We ended up eating outside, licking fingers, swapping stories, and vowing to make the night a new tradition. Those spicy, messy plates brought an easy laughter that was impossible to plan for.
Swapping In Sides Everyone Will Love
The first time I put a big platter of Peri Peri chicken alongside crispy fries and a simple green salad, it vanished before I could even refill drinks. Guests still mention the garlic-infused fries and how well they stood up to the bold chicken. Sometimes, I swap in fluffy Portuguese rice, letting it absorb any drippings. No matter the sides, something light and fresh balances the spice just right.
Finding Your Favorite Spice Level
I always urge first-timers to taste the marinade before committing all those fiery chilis. Scraping the seeds or subbing one or two with sweet chilies really transforms how much heat you’ll get. Let the sauce be punchy but not overwhelming, unless you’re set on a true tongue-tingler. Your perfect balance might change with the weather or the crowd – embrace the experiment.
Troubleshooting Peri Peri Like a Kitchen Pro
When the chicken stuck to the grill the first time, I realized brushing the grates with oil beforehand is no small step. Sometimes, I add a little water or extra lemon to thin a thick marinade – it helps coat evenly without clumping. If you ever overcook the chicken, a squeeze of fresh lemon and extra herbs helps revive the juiciness.
- Don’t forget to use tongs, not a fork, to avoid losing any delicious juices.
- If the skin isn’t browning, let it sit under a hot grill for an extra couple of minutes at the end.
- Savor the process – cooking with your senses always beats following a clock.
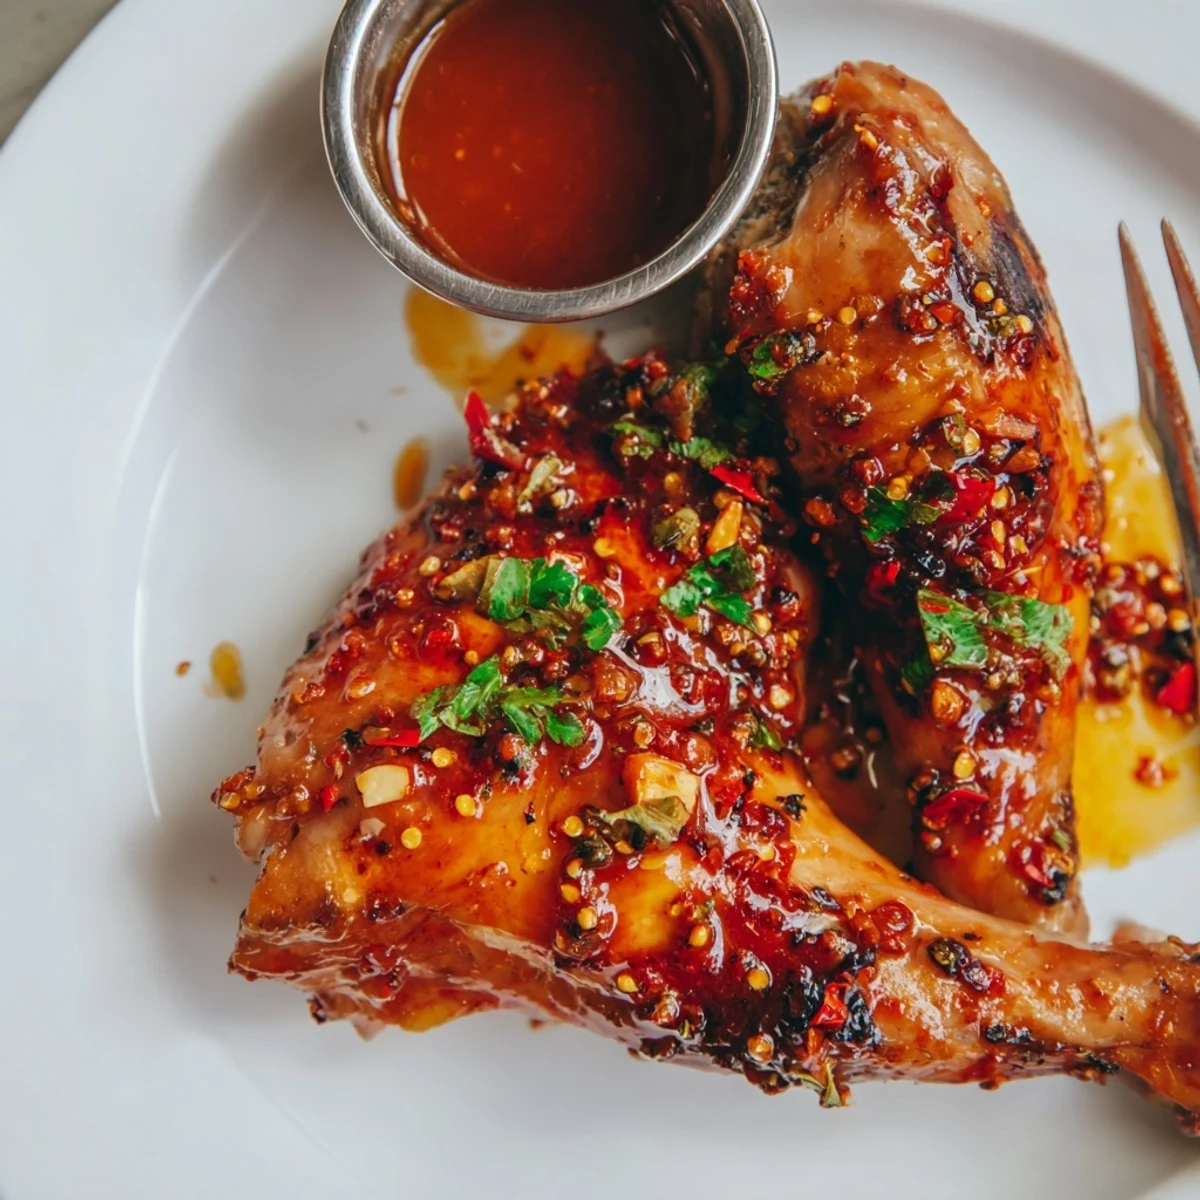 Save to Pinterest
 Let this Peri Peri chicken recipe add a touch of excitement to your kitchen. Cook boldly and be ready for sticky fingers, fiery smiles, and plenty of happy requests for seconds.
Your Recipe Questions Answered
- → How long should I marinate the chicken?
-
Marinate for at least 3 hours, though overnight yields deeper flavor and more tender meat. Bring chicken to near room temperature for 20–30 minutes before cooking to ensure even doneness.
- → Can I use whole chicken or only pieces?
-
Both work. Bone-in pieces (thighs, legs) cook reliably and stay juicy; a spatchcocked whole chicken roasts or grills evenly but requires slightly longer cooking time and monitoring.
- → How can I reduce the heat without losing flavor?
-
Remove seeds from the chiles, use fewer bird’s eye chiles or substitute milder peppers, and increase red bell pepper or a touch of sugar to balance heat while keeping the bright, smoky profile.
- → Is grilling or oven roasting better?
-
Grilling adds char and a smoky finish, ideal for crisp skin. Oven roasting at 200°C (400°F) is hands-off and still produces juicy meat—use a rack and turn halfway for even browning.
- → Can I use the leftover marinade as a sauce?
-
Reserve a portion of the marinade before adding raw chicken to serve as a sauce. If using marinade that touched raw poultry, bring it to a rolling boil for several minutes to ensure safety.
- → What sides and wines pair well with this dish?
-
Serve with fries, a crisp salad, or Portuguese rice. Chilled Rosé or a zesty Sauvignon Blanc complement the lemony heat and smoky paprika notes.
