 Save to Pinterest
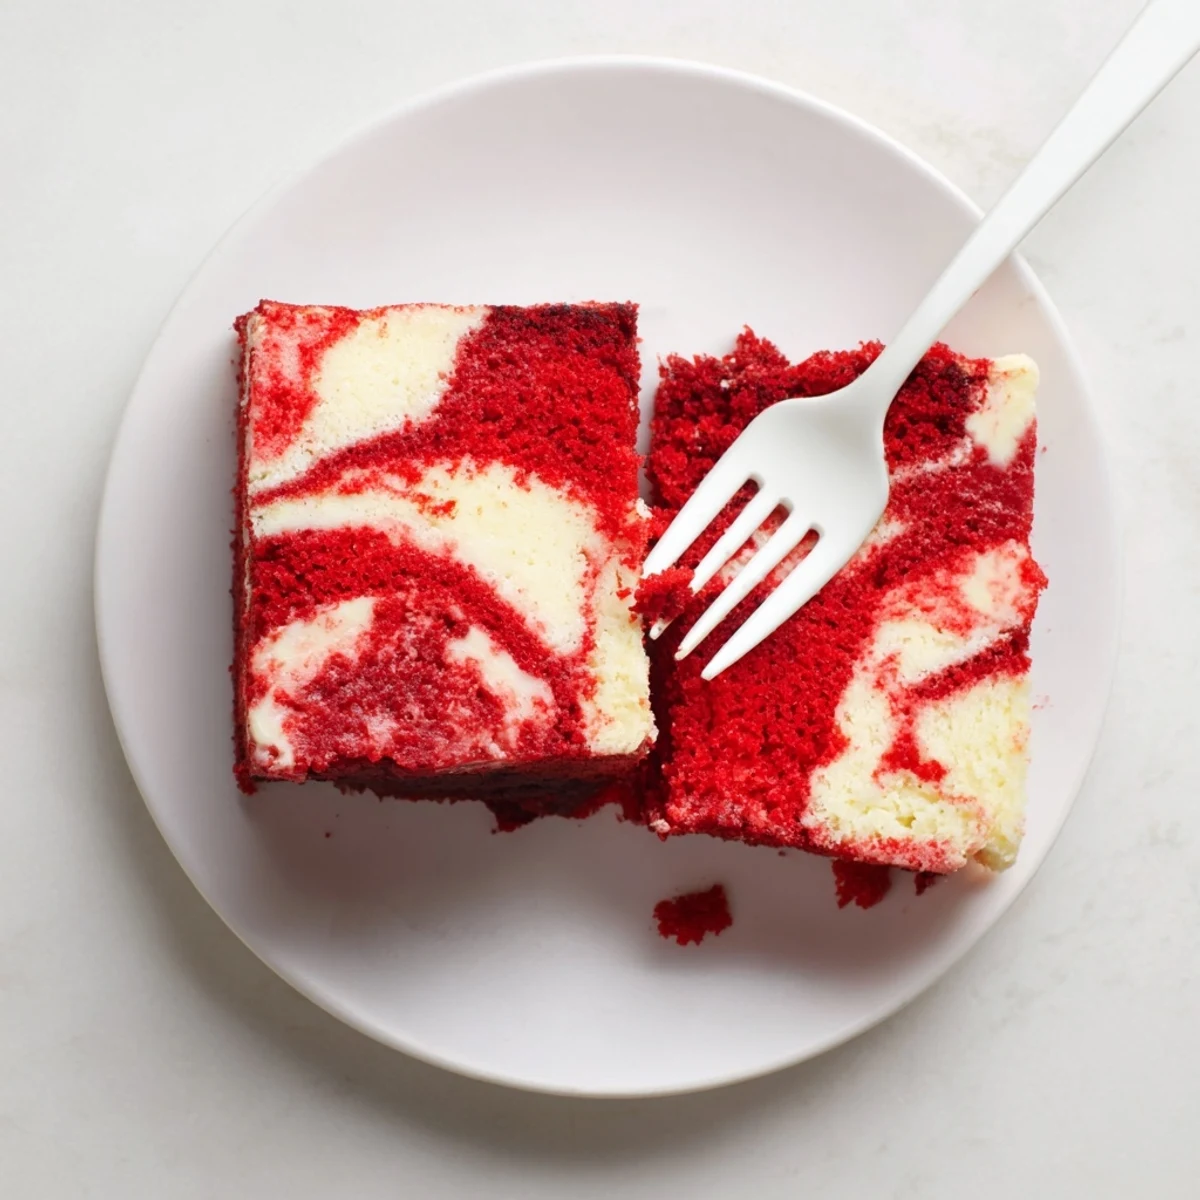
 This stunning dessert combines classic red velvet cake with rich cheesecake swirls for a beautiful marbled effect. The moist, tender cake pairs perfectly with the creamy cheesecake filling, creating an irresistible treat that's ideal for birthdays, holidays, or any special occasion.
Ready in just over an hour, this 12-serving dessert uses pantry staples along with cream cheese to achieve bakery-quality results at home. The vibrant red color and elegant swirled pattern make it a showstopping centerpiece for any gathering.
Serve chilled or at room temperature, optionally dusted with powdered sugar or topped with cream cheese glaze for extra indulgence. Leftovers store beautifully in the refrigerator for up to four days.
The first time I made red velvet cheesecake swirl cake, I stood over the counter with a butter knife, hesitating. I had already baked dozens of red velvet cakes, but adding that cheesecake layer felt like tempting fate. What if the swirls turned muddy? What if the cheesecake sank? My kitchen smelled like cocoa and vanilla, and I took a breath, dragging the knife through the batter like I was painting. When it came out of the oven, those marbled ribbons of cream cheese against the crimson cake made my heart actually skip a beat.
I brought this cake to a friends birthday last spring, and her aunt asked for the recipe before she even finished her first slice. Someone actually gasped when I cut into it and revealed that marbled interior. Theres something about red velvet and cream cheese together that feels like a celebration, even on a random Tuesday. Now its my go to when I want to impress people without actually trying that hard.
Ingredients
- 2 cups all purpose flour: This foundation gives the cake structure while keeping it tender
- 1 ½ cups granulated sugar: Sweetens both the cake and helps create that velvety crumb
- 1 tsp baking powder and ½ tsp baking soda: The duo works together for the perfect rise
- 1 tbsp unsweetened cocoa powder: Just enough for depth without overpowering the classic red velvet flavor
- ½ tsp salt: Balances sweetness and enhances all the other flavors
- 1 cup buttermilk room temperature: The secret to that signature red velvet moisture and tenderness
- ½ cup vegetable oil: Keeps the cake incredibly moist for days
- 2 large eggs room temperature: Bind everything together and help the cake rise properly
- 2 tsp vanilla extract: Pure vanilla makes all the difference here
- 1 tsp white vinegar: Reacts with the buttermilk for extra tenderness
- 2 tbsp red food coloring: Gel coloring gives you that vibrant restaurant worthy red
- 8 oz cream cheese softened: Use full fat for the creamiest swirl possible
- ⅓ cup granulated sugar: Just enough sweet to balance the tangy cream cheese
- 1 large egg: Gives the cheesecake layer structure without making it rubbery
- 1 tsp vanilla extract: Rounds out the cheesecake flavor beautifully
Instructions
- Prep your pan and preheat the oven:
- Set your oven to 350°F and grease a 9x13 inch pan, then line it with parchment paper so you can lift the whole cake out later if you want neat squares.
- Whisk the dry ingredients together:
- In a large bowl, combine the flour, sugar, baking powder, baking soda, cocoa powder, and salt until everything is evenly distributed.
- Mix the wet ingredients:
- In another bowl, whisk together the buttermilk, oil, eggs, vanilla, vinegar, and red food coloring until the mixture is uniformly red and smooth.
- Combine the batters:
- Pour the wet ingredients into the dry and mix just until you no longer see streaks of flour. Overmixing will make the cake tough, so stop as soon as it comes together.
- Spread the red velvet batter:
- Pour the red velvet mixture into your prepared pan and use a spatula to spread it into an even layer.
- Make the cheesecake swirl:
- Beat the softened cream cheese until smooth, then add the sugar, egg, and vanilla. Mix until creamy and completely blended, about 2 minutes.
- Create the marble effect:
- Drop spoonfuls of the cheesecake batter all over the red velvet base, then use a knife or skewer to gently swirl through both batters. Do not over swirl or you will lose the definition.
- Bake until set:
- Bake for 45 to 50 minutes until a toothpick inserted into the center comes out clean. A little cheesecake on the toothpick is totally fine.
- Cool completely before slicing:
- Let the cake cool completely in the pan on a wire rack. This is crucial because the cheesecake layer needs to set up properly.
 Save to Pinterest
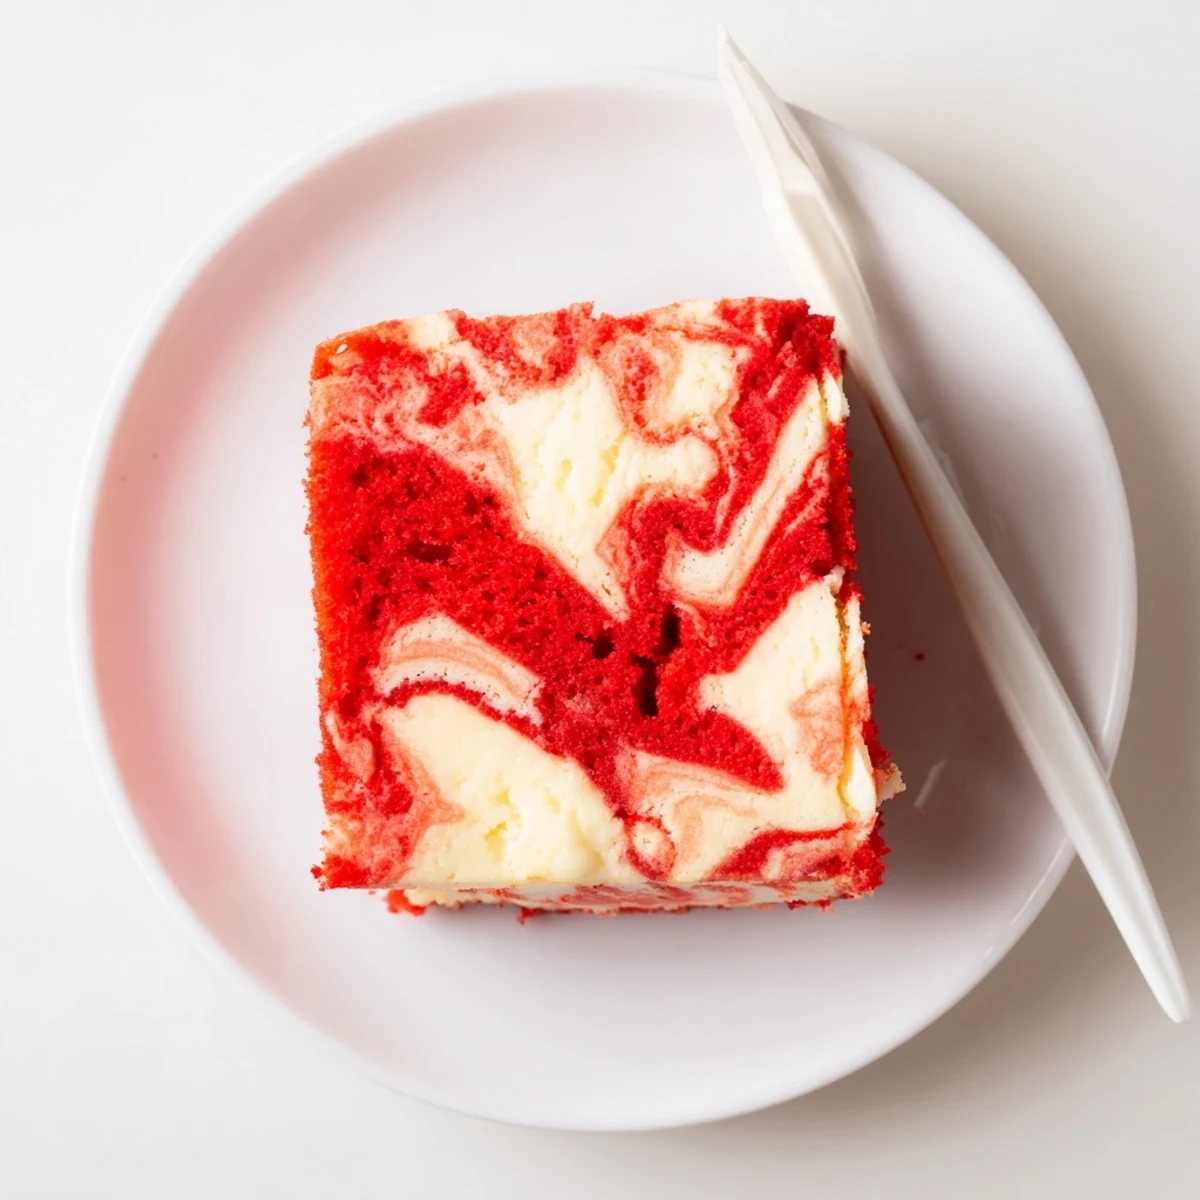
 My sister requested this cake for her wedding anniversary instead of a fancy bakery dessert. That is when I knew this recipe had graduated from party favorite to family legend. There is something about slicing into that red and cream marbled surface that feels like opening a present every single time.
Getting That Perfect Swirl
I have learned that the best swirls happen when you do not overthink it. Drop the cheesecake batter in uneven dollops across the surface, then drag your knife through in a figure eight or S pattern just once or twice. The mistake I made early on was trying to create perfect patterns, which just blends everything together. Less is more here.
Making It Ahead
This cake actually tastes better the next day, which is rare for baked goods. The flavors meld together and the texture becomes even more velvety. I bake it the evening before serving, let it cool completely, then cover it tightly with plastic wrap. The next morning, I might dust it with powdered sugar just before serving to hide any imperfections from the fridge.
Serving Suggestions That Wow
While this cake is stunning on its own, I have learned a few presentation tricks over the years. A light dusting of powdered sugar over the top makes those swirls pop even more dramatically. Sometimes I will whip up a quick cream cheese glaze and drizzle it back and forth in thin lines, which looks professional but takes literally two minutes.
- Slice this cake with a sharp knife wiped clean between cuts for the cleanest edges
- Bring it to room temperature for about 30 minutes before serving if it has been refrigerated
- Pair each slice with fresh berries or a dollop of whipped cream for extra elegance
 Save to Pinterest
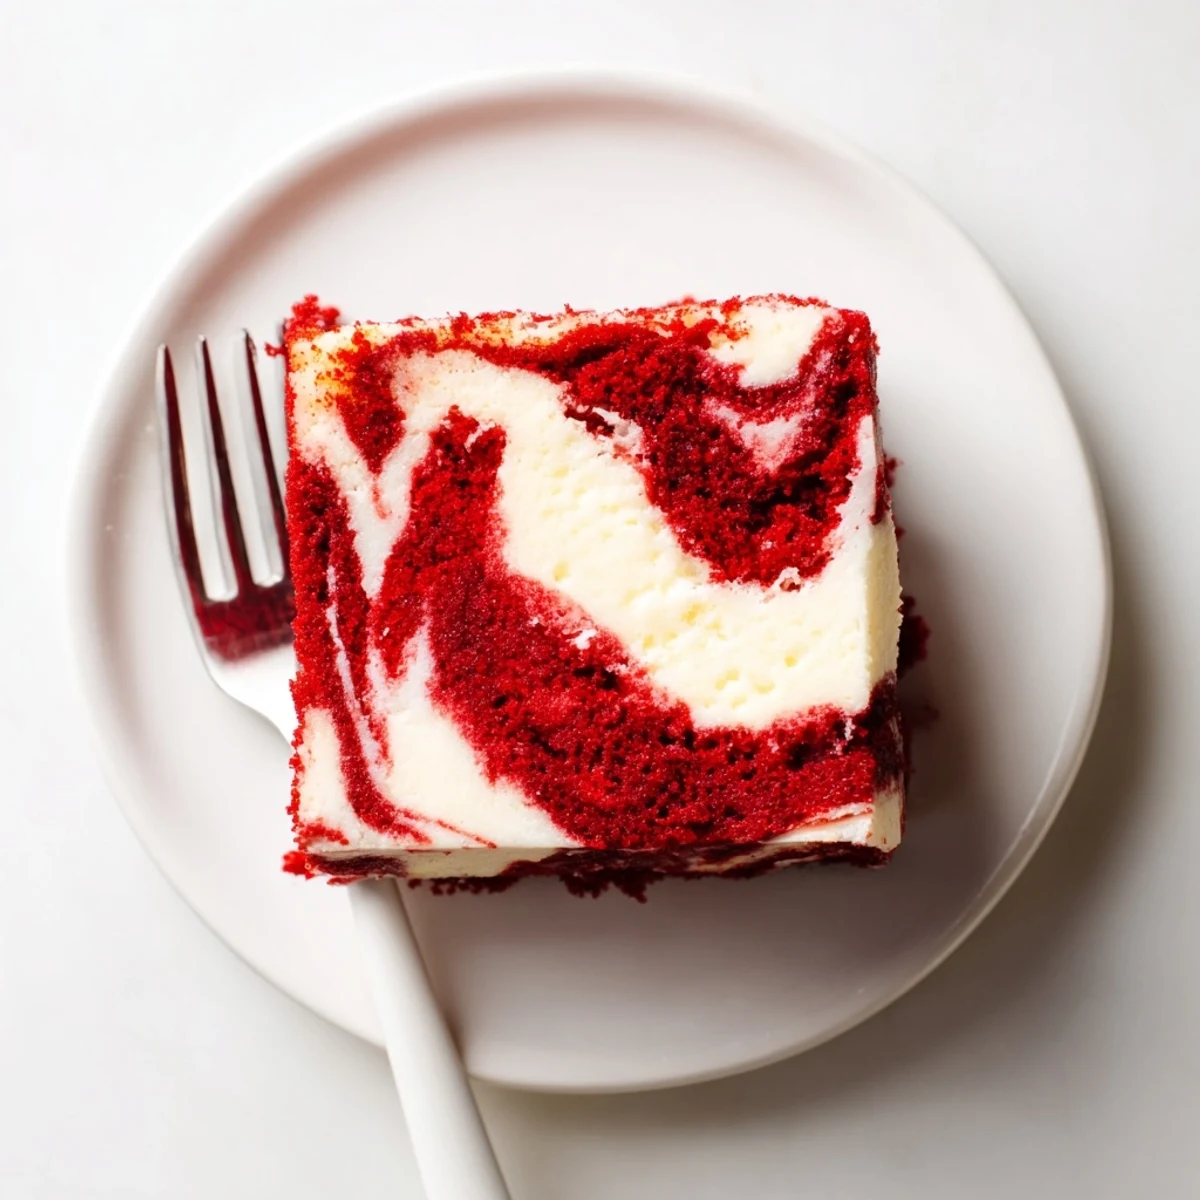
 Every time I make this cake, I am reminded that the most beautiful desserts often come from the simplest ideas. There is pure joy in cutting that first slice and seeing those gorgeous swirls.
Your Recipe Questions Answered
- → Can I use natural food coloring instead of red dye?
-
Yes, beet juice or pomegranate juice can provide natural red coloring, though the hue will be more subtle than gel or liquid food coloring. For the most vibrant red, gel food coloring works best.
- → How do I know when the cake is done baking?
-
Insert a toothpick into the center—if it comes out clean or with just a few moist cheesecake crumbs, the cake is done. A little cheesecake on the toothpick is perfectly fine since the filling stays creamy.
- → Can I make this ahead of time?
-
Absolutely! This cake actually tastes better after chilling overnight. Bake it a day before serving, let it cool completely, then refrigerate covered. Bring to room temperature for 30 minutes before serving, or serve chilled.
- → Why is my red velvet cake dense instead of fluffy?
-
Overmixing the batter can create a dense texture. Mix wet and dry ingredients just until combined—some small lumps are okay. Also ensure your baking powder and soda are fresh, and don't open the oven door too often while baking.
- → Can I freeze this cake?
-
Yes, freeze the completely cooled cake whole or in individual slices. Wrap tightly in plastic wrap, then foil, and freeze for up to 3 months. Thaw overnight in the refrigerator before serving.
- → What's the best way to achieve clean cheesecake swirls?
-
Drop dollops of cheesecake batter over the red velvet base, then use a knife or skewer to gently swirl through both layers. Don't over-swirl or you'll lose the marbled effect. Make just 3-4 figure-eight motions for best results.
