 Save to Pinterest
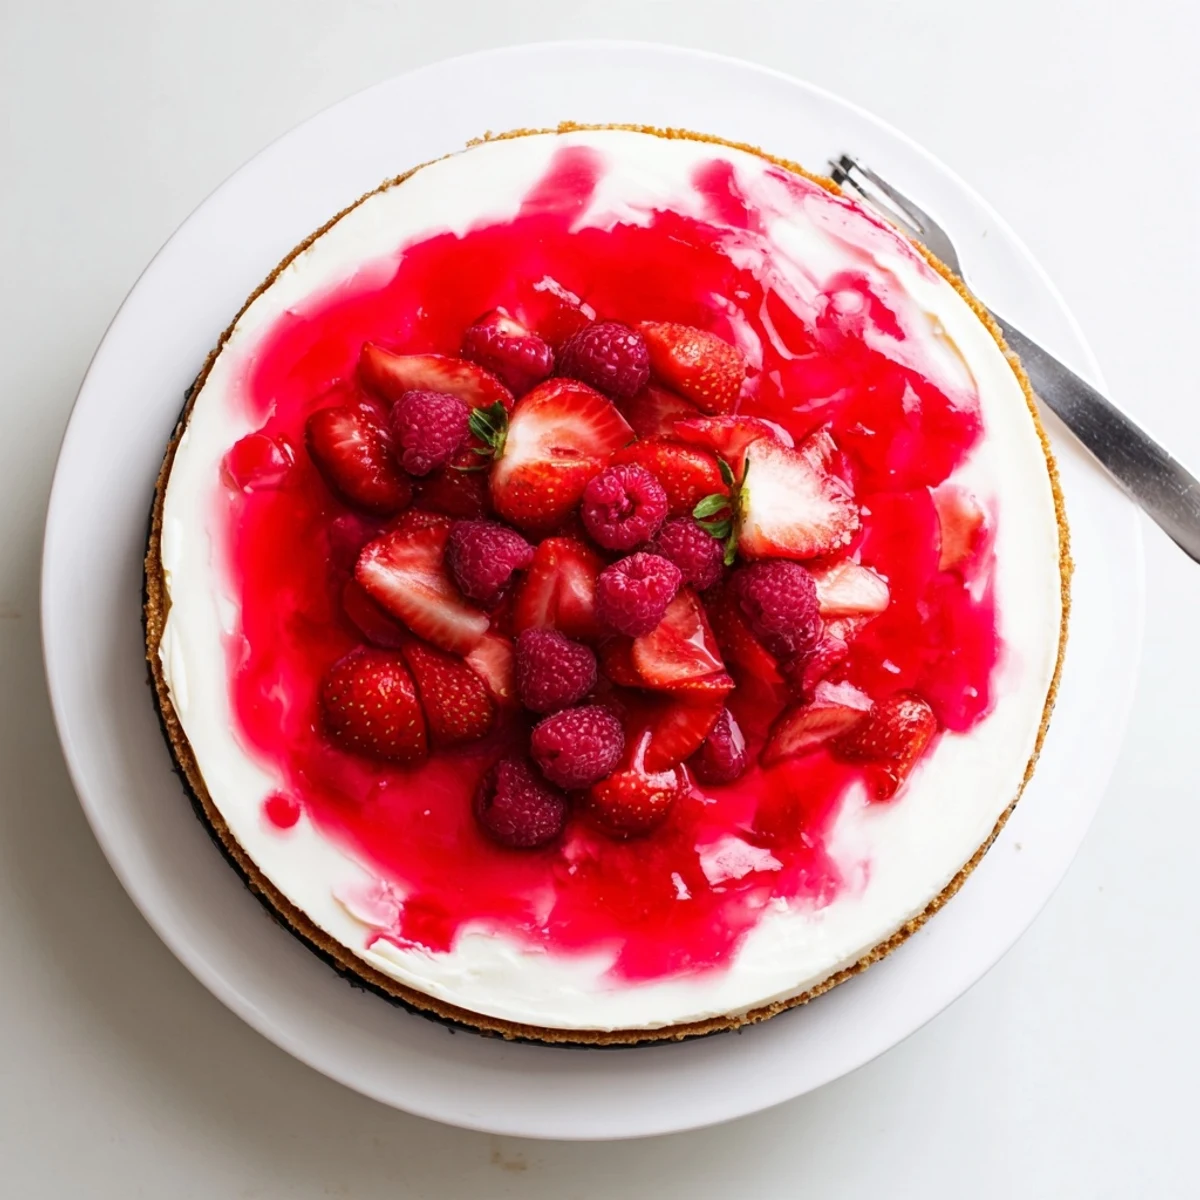
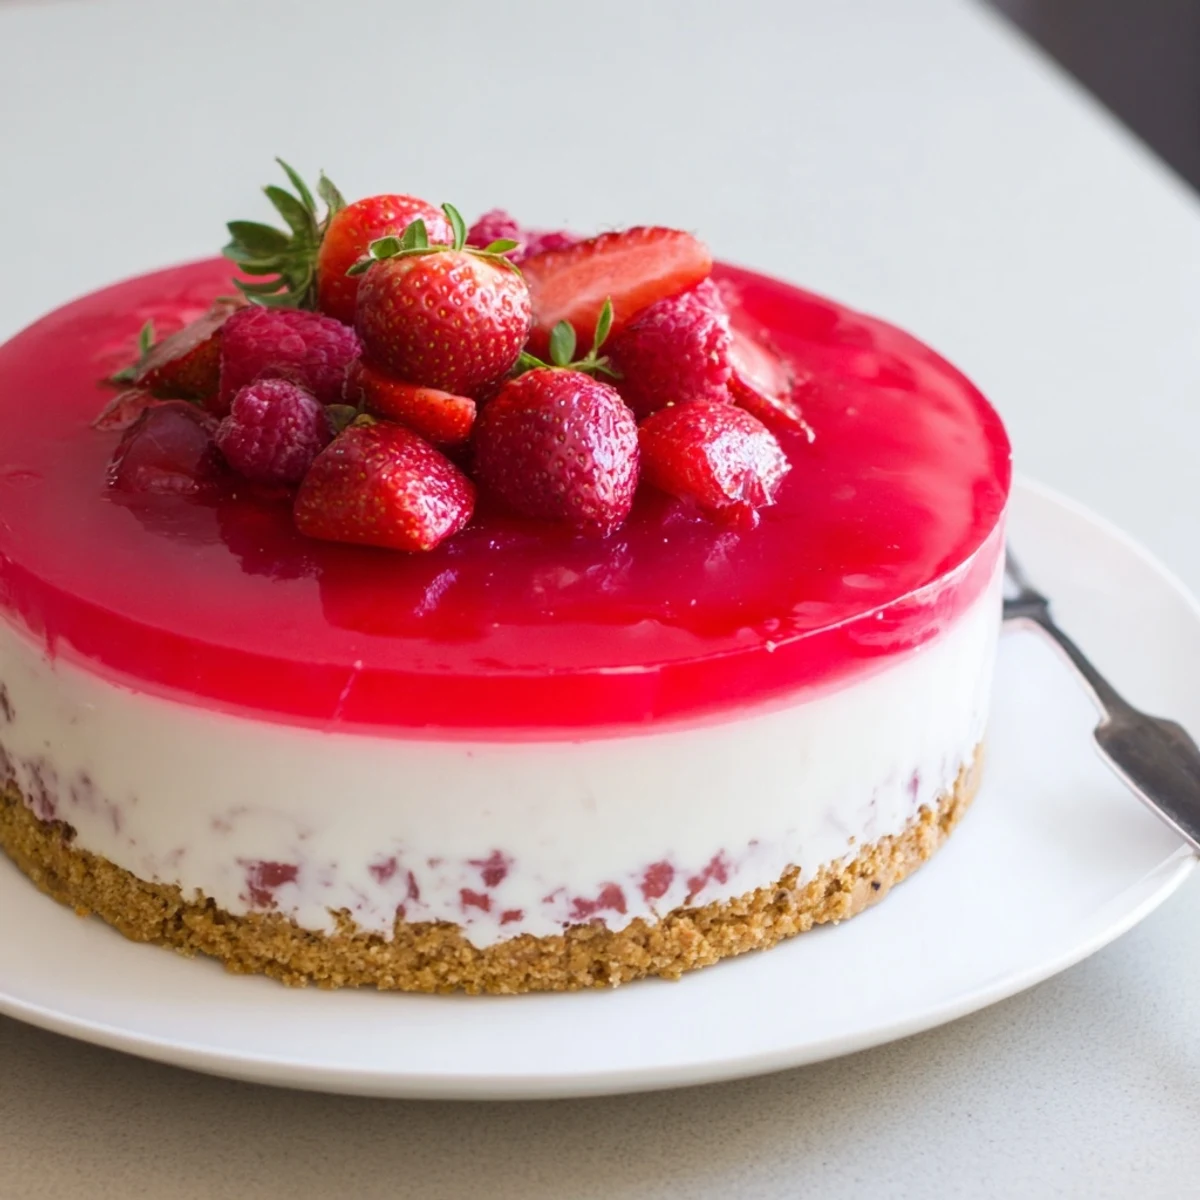
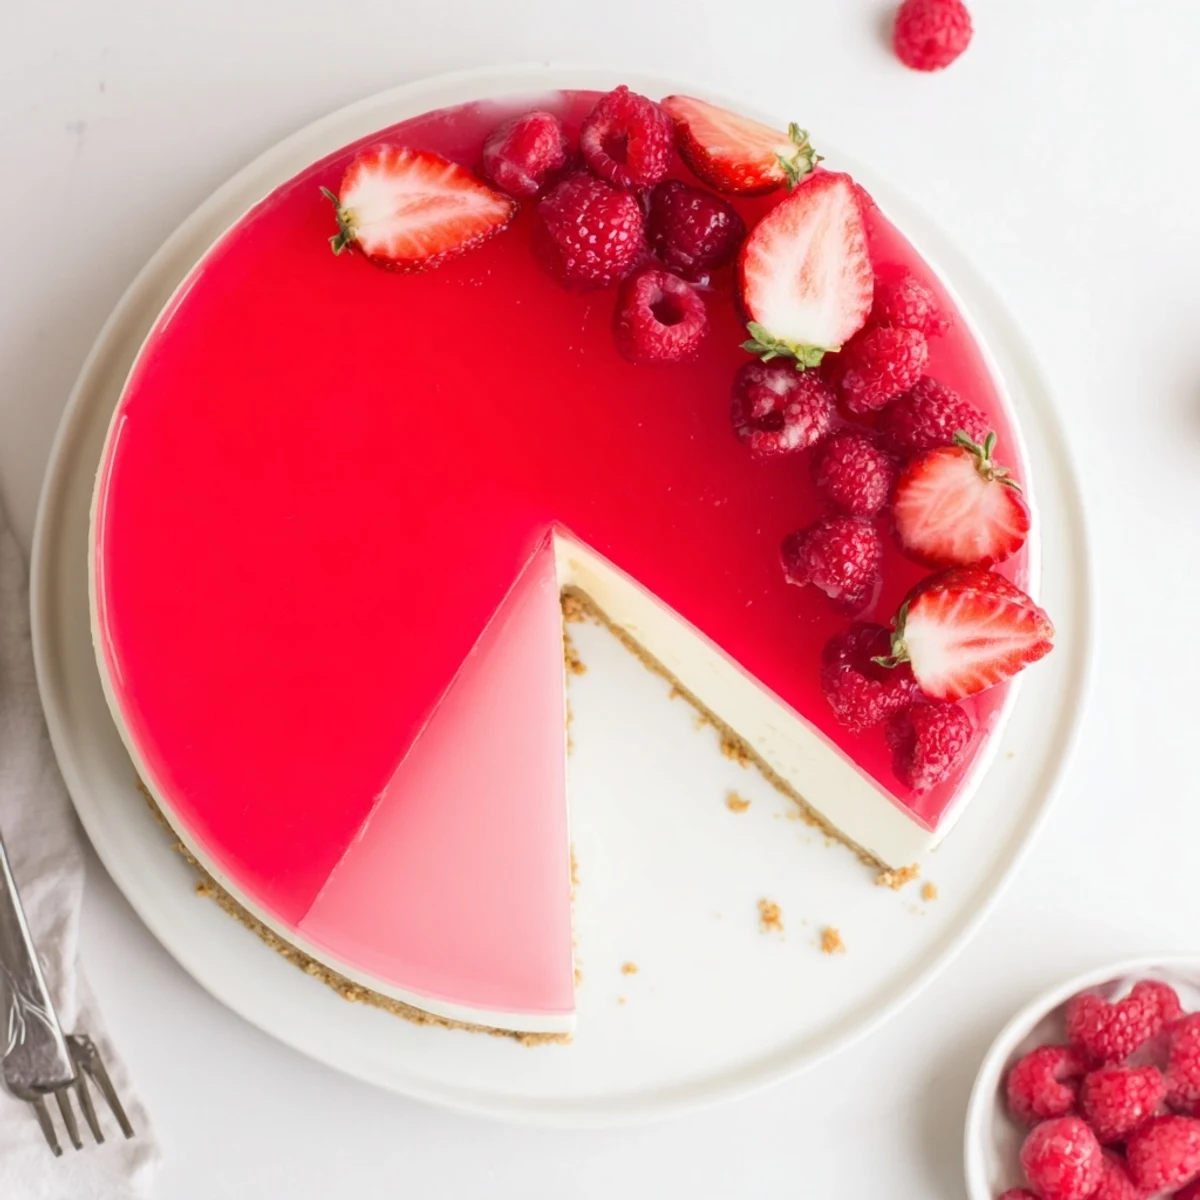
 This indulgent yet light dessert features a creamy Greek yogurt and cream cheese filling resting on a classic buttery graham cracker crust. The tanginess pairs perfectly with a glossy fruit-flavored jello layer that adds refreshing sweetness and vibrant color. Best of all, no baking is required—just combine, chill, and let your refrigerator do all the work.
The air conditioning was broken that July, and the thought of turning on my oven made me sweat just thinking about it. My sister was coming over for dinner and I had promised dessert, so I stood in front of the open refrigerator letting cool air wash over me, wondering how I could possibly make something impressive without heat. That's when I noticed the Greek yogurt and cream cheese sitting side by side, and suddenly this no bake cheesecake idea clicked into place like it had been waiting there all along.
I first made this for a summer potluck when the thermometer hit ninety-five degrees, and I watched my friend Sarah take her first bite, eyes widening. She made me write down the recipe right there on a napkin, and now it's become her go-to for every occasion when she wants to bring something that looks fancy but doesn't require turning on her oven.
Ingredients
- Graham cracker crumbs: These create that classic buttery, slightly sandy base that perfectly contrasts with the creamy filling above
- Unsalted butter: Melted and mixed into the crumbs, this binds everything together and adds that rich, toasted flavor we all love
- Granulated sugar: Just enough to sweeten the crust without making it cloying or interfering with the buttery notes
- Cream cheese: The backbone of the filling, make sure it's properly softened to avoid any lumps in your final cheesecake
- Greek yogurt: This is the secret ingredient that adds tang and lightness while keeping the filling stable enough to hold its shape
- Powdered sugar: Sift this first to prevent any white specks in your otherwise perfectly smooth cheesecake layer
- Vanilla extract: Pure vanilla makes all the difference here, rounding out the tangy elements with warm sweetness
- Lemon juice: Freshly squeezed brightens the entire filling and balances the richness of the cream cheese
- Powdered gelatin: This helps stabilize the filling so it cuts cleanly without being rubbery or overly firm
- Cold water: Essential for blooming the gelatin properly before you dissolve it
- Fruit flavored gelatin: Strawberry, raspberry, or lemon work beautifully here and create that gorgeous transparent topping
- Boiling water: Needed to fully dissolve the jello crystals so your topping sets perfectly clear
- Fresh berries: These are optional but they make the most beautiful garnish, floating in the jello like jewels
Instructions
- Prep your pan:
- Line a 9 inch springform pan with parchment paper, making sure to crease it into the corners so your crust releases easily later
- Make the crust:
- Mix graham cracker crumbs, melted butter, and sugar until every bit of crumb is coated and it holds together when you squeeze it, then press it firmly into your prepared pan and chill it
- Bloom the gelatin:
- Sprinkle the powdered gelatin over cold water in a small bowl and let it sit for about 5 minutes until it looks like tiny translucent bumps absorbing the liquid
- Make the filling:
- Beat cream cheese until completely smooth, then add Greek yogurt, powdered sugar, vanilla, and lemon juice, beating until the mixture is silky and no lumps remain
- Add the gelatin:
- Microwave the bloomed gelatin for just 15 seconds until it's completely dissolved, let it cool slightly so it doesn't seize when you add it, then whisk it into your cheesecake mixture
- Set the cheesecake layer:
- Pour the filling over your chilled crust, smooth the top with a spatula, and refrigerate for 2 hours until it's firm to the touch
- Prepare the jello:
- Dissolve the fruit flavored gelatin in boiling water, stir until completely dissolved, then add cold water and let it cool to room temperature
- Add the topping:
- Gently pour the cooled jello over your set cheesecake layer, being careful not to disturb the surface, then refrigerate for at least 2 more hours until completely firm
- Serve:
- Run a thin knife around the edge of the pan to release the cheesecake, then release the springform and garnish with fresh berries if you like
 Save to Pinterest
 This became my daughter's absolute favorite birthday cake tradition because she could choose whatever jello flavor and fruit combination she wanted each year. Last summer she picked lime jello with kiwi slices and it looked like something from a fancy bakery window.
Making It Gluten Free
I've made this for friends with gluten sensitivity using gluten free graham crackers, and honestly, nobody could tell the difference. The crust still holds together beautifully and the texture remains perfectly crisp against the creamy filling.
Customizing The Flavors
While strawberry and raspberry are classic choices, I've experimented with peach jello topped with fresh sliced peaches in late summer. Lemon jello with a bit of lemon zest added to the cheesecake filling creates an incredibly bright dessert that feels almost elegant enough for a dinner party.
Serving Suggestions
I love serving this with a glass of chilled prosecco or a light fruity white wine that complements whatever jello flavor you've chosen. The contrast between the cold, creamy cheesecake and the bubbles is absolutely perfect.
- Let the cheesecake sit at room temperature for about 5 minutes before serving for the best texture
- Dip your knife in hot water and wipe it clean between slices for perfectly smooth cuts
- This keeps beautifully in the refrigerator for up to 3 days, though it rarely lasts that long in my house
 Save to Pinterest
 There's something so satisfying about serving a dessert that looks like it took all day but actually came together with minimal effort and zero oven time.
Your Recipe Questions Answered
- → Can I make this ahead of time?
-
Absolutely. This dessert actually improves when made ahead, allowing flavors to meld and layers to set completely. You can prepare it up to 2 days in advance and store it covered in the refrigerator until ready to serve.
- → What jello flavors work best?
-
Strawberry, raspberry, lemon, and orange all pair beautifully with the tangy Greek yogurt filling. Choose complementary flavors based on your preference or seasonal fruit availability for a cohesive taste profile.
- → Can I use low-fat Greek yogurt?
-
Yes, you can substitute low-fat Greek yogurt, though the texture may be slightly less rich. Full-fat or 2% yogurt provides creamier results, but low-fat versions still yield delicious and satisfying results.
- → How long does it take to set completely?
-
The cheesecake layer needs about 2 hours to firm up, while the jello topping requires an additional 2 hours. For best results, plan for at least 4 hours total chilling time, or make it the night before serving.
- → Can I use regular yogurt instead of Greek yogurt?
-
Greek yogurt is preferred for its thick, creamy texture and higher protein content. Regular yogurt contains more water, which could affect the setting. If substituting, strain regular yogurt through cheesecloth overnight to remove excess liquid.
- → Do I need a springform pan?
-
While a springform pan makes unmolding easier, you can use a regular 9-inch cake pan lined with parchment paper with overhanging sides. The parchment handles will help you lift the dessert out once set.
