 Save to Pinterest
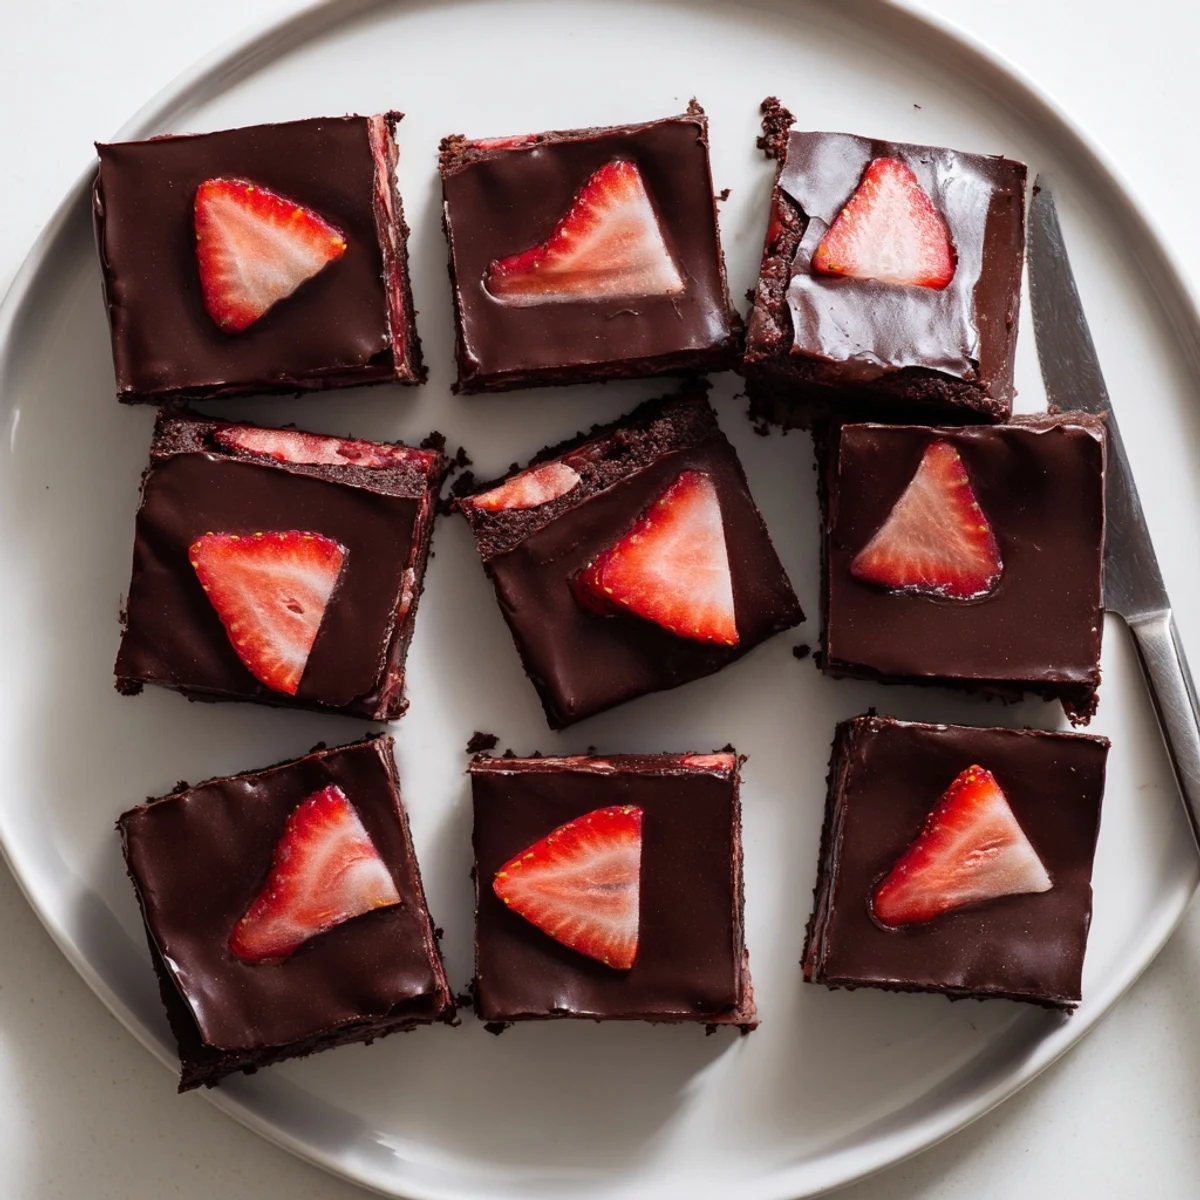
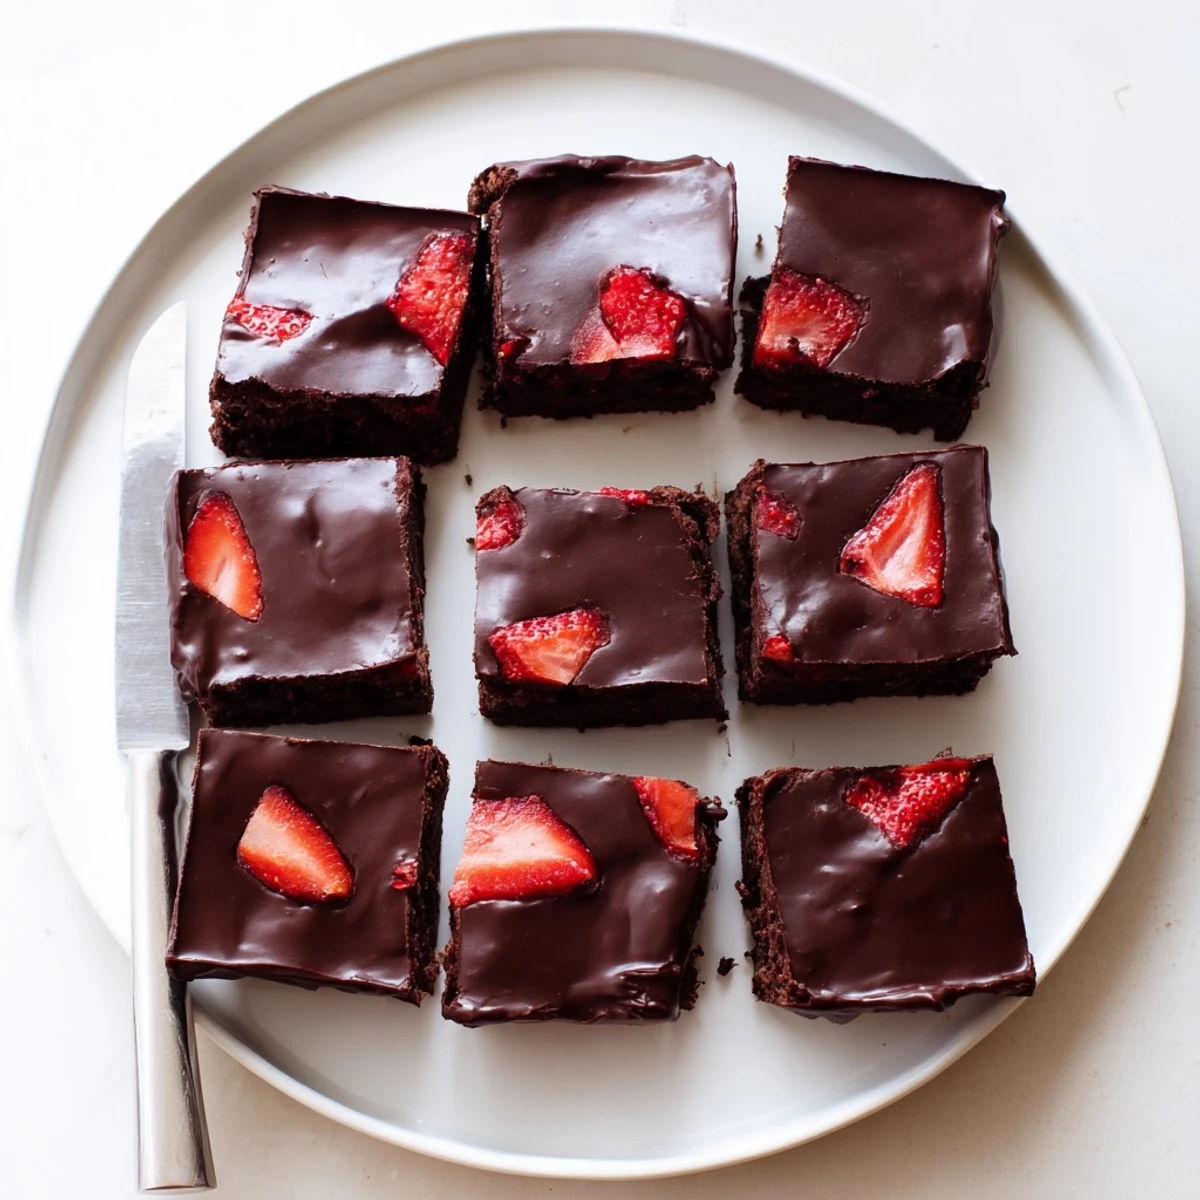
 These chocolate covered strawberry brownies combine three irresistible layers into one decadent treat. A dense, fudgy brownie base made with dark chocolate and butter forms the foundation.
Fresh sliced strawberries are arranged over the cooled brownie, adding brightness and natural sweetness. A glossy chocolate coating seals everything together, creating a satisfying snap when you bite in.
Plan ahead for cooling and setting time—about two hours total. The result is a showstopping dessert perfect for Valentine's Day, dinner parties, or any occasion that calls for something special.
The rain was hammering against the kitchen window the afternoon these brownies were born, mostly because I had a flat of strawberries threatening to turn and a half eaten bar of dark chocolate staring me down from the counter. I tossed chopped chocolate into a bowl, layered sliced berries over warm brownie, and poured a glossy shell of melted semisweet on top without thinking twice. The resulting slab cracked like a truffle when I cut it, revealing jammy fruit nestled into fudgy cake. I have never looked at a plain brownie the same way since.
I brought a tray of these to a friends rooftop birthday dinner last summer and watched three people argue over the last corner piece until the birthday girl diplomatically split it with her thumb. Nobody talked for a solid two minutes after that first bite, which is honestly the highest compliment a dessert can receive.
Ingredients
- Unsalted butter (115 g): Use good butter here because its fat carries the chocolate flavor and a cheaper brand will leave a waxy film on the finished brownie.
- Dark chocolate, 60 to 70 percent cocoa (200 g), chopped: Chop it yourself from a bar rather than using chips, because bar chocolate melts more evenly and tastes richer.
- Granulated sugar (150 g): This amount balances the bitterness of dark chocolate without pushing the whole thing into cloying territory.
- Large eggs (2): Room temperature eggs incorporate more smoothly into the warm batter and give the brownie its characteristic chew.
- Vanilla extract (1 tsp): A real extract, not imitation, rounds out the cocoa and adds warmth you can actually taste.
- All purpose flour (75 g): Measure by spooning into the cup and leveling off, because packed flour turns fudgy brownies into cakey ones.
- Salt (half tsp): Do not skip this, because salt makes chocolate taste like itself.
- Fresh strawberries (250 g), hulled and thinly sliced: Smaller, ripe but firm berries hold their shape best and release less water into the chocolate topping.
- Semisweet chocolate chips or chopped chocolate (170 g): This becomes the snappy top shell, so pick something you would happily eat by the handful.
- Coconut oil or unsalted butter (1 tbsp): A small amount stirred into the coating gives it that professional shine and helps it set with a clean break.
Instructions
- Preheat and prepare the pan:
- Set your oven to 175 degrees Celsius (350 degrees Fahrenheit) and line a 20 by 20 centimeter square baking pan with parchment, leaving overhang on two sides so you can lift the whole slab out later.
- Melt the base chocolate and butter:
- Set a heatproof bowl over a saucepan of barely simmering water, add the butter and chopped dark chocolate, and stir gently until the mixture is completely smooth and glossy. Take it off the heat before it gets too hot to touch.
- Build the batter:
- Whisk the sugar into the warm chocolate mixture, then beat in the eggs one at a time until each disappears completely. Stir in the vanilla until everything smells like a bakery at midnight.
- Fold in the dry ingredients:
- Add the flour and salt, folding with a spatula just until no white streaks remain, because overmixing builds gluten and turns a fudgy brownie into something dry.
- Bake the brownie base:
- Pour the batter into your lined pan and spread it to the edges, then bake for 25 to 30 minutes until a toothpick poked into the center comes out with moist crumbs clinging to it. The edges should look set but the middle will still have a slight wobble.
- Cool completely:
- Leave the brownie in the pan on a wire rack until it reaches room temperature, because a warm base will melt the strawberries into mush and nobody wants that.
- Arrange the strawberry layer:
- Lay the sliced strawberries in a single even layer across the cooled brownie, slightly overlapping them so every bite gets a hit of fruit.
- Make the chocolate coating:
- Melt the semisweet chocolate with the coconut oil or butter in a clean heatproof bowl over simmering water, stirring until it pours like silk.
- Pour and set:
- Pour the melted coating over the strawberries and gently spread it to the edges with a spatula, covering every red sliver. Refrigerate the pan for at least one hour until the top is firm to the touch.
- Cut and serve:
- Lift the whole slab out using the parchment overhang, then cut into twelve squares with a sharp knife warmed under hot water and wiped dry between cuts for the cleanest edges.
 Save to Pinterest
 The first time I served these to my mother she closed her eyes after the first bite and said nothing for so long I thought I had ruined them. Then she asked for a second piece and told me to write the recipe down immediately, which from her is practically a standing ovation.
Timing and Planning
Factor in the full two hours from start to finished and cut brownies, because the cooling and setting time is non negotiable. I once tried to rush the chill step for a potluck and ended up with a strawberry chocolate puddle that still tasted great but looked like a crime scene.
Flavor Variations
A tablespoon of espresso powder dissolved into the batter makes the chocolate taste deeper without any coffee flavor coming through. You can swap the dark chocolate for milk chocolate if you prefer a sweeter brownie, though I find the contrast between a dark base and the semisweet top is what makes these memorable.
Storage and Serving
Keep leftovers in the refrigerator and eat them within two days because fresh strawberries are perishable and will soften the brownie layer over time. A cold square straight from the fridge has the best snap, but letting it sit at room temperature for ten minutes softens the crumb nicely.
- Always use a warm knife for cutting to get those clean bakery style edges.
- These pair surprisingly well with a glass of dry sparkling wine.
- Check your chocolate labels for nut traces if anyone eating these has allergies.
 Save to Pinterest
 Every time I make these I think about that rainy afternoon when a refrigerator cleanup turned into the best dessert I have stumbled into, and I hope they bring a little of that happy accident energy to your kitchen too.
Your Recipe Questions Answered
- → Can I use frozen strawberries instead of fresh?
-
Fresh strawberries work best for this dessert because they hold their shape and don't release excess moisture. Frozen strawberries tend to make the brownie layer soggy as they thaw. If you must use frozen, thaw and pat them completely dry with paper towels before arranging on the brownies.
- → How do I get clean cuts when slicing the brownies?
-
Use a sharp knife warmed under hot water, then dried. Wipe the blade clean between each cut. Chilling the brownies for at least an hour before cutting also helps the chocolate shell firm up, resulting in cleaner edges.
- → What percentage of cocoa should the dark chocolate have?
-
A dark chocolate between 60% and 70% cocoa is ideal for the brownie base. This range provides rich chocolate flavor without excessive bitterness. Anything above 70% may make the brownies too intense, while lower percentages will be sweeter and less complex.
- → How long do these brownies stay fresh?
-
Because of the fresh strawberry layer, these brownies are best enjoyed within one to two days. Store them in an airtight container in the refrigerator. Let them sit at room temperature for about 15 minutes before serving for the best texture and flavor.
- → Can I make the brownie base ahead of time?
-
Yes, you can bake the brownie base a day in advance. Let it cool completely, then wrap the pan tightly with plastic wrap and keep at room temperature. Add the strawberry layer and chocolate coating the next day when you're ready to finish them.
- → Why is my chocolate coating not shiny?
-
The coconut oil in the coating helps create that glossy finish. Make sure you melt the chocolate gently over simmering water, not boiling, and stir until completely smooth. Avoid getting any water in the chocolate, as even a drop can cause it to seize and lose its shine.
