 Save to Pinterest
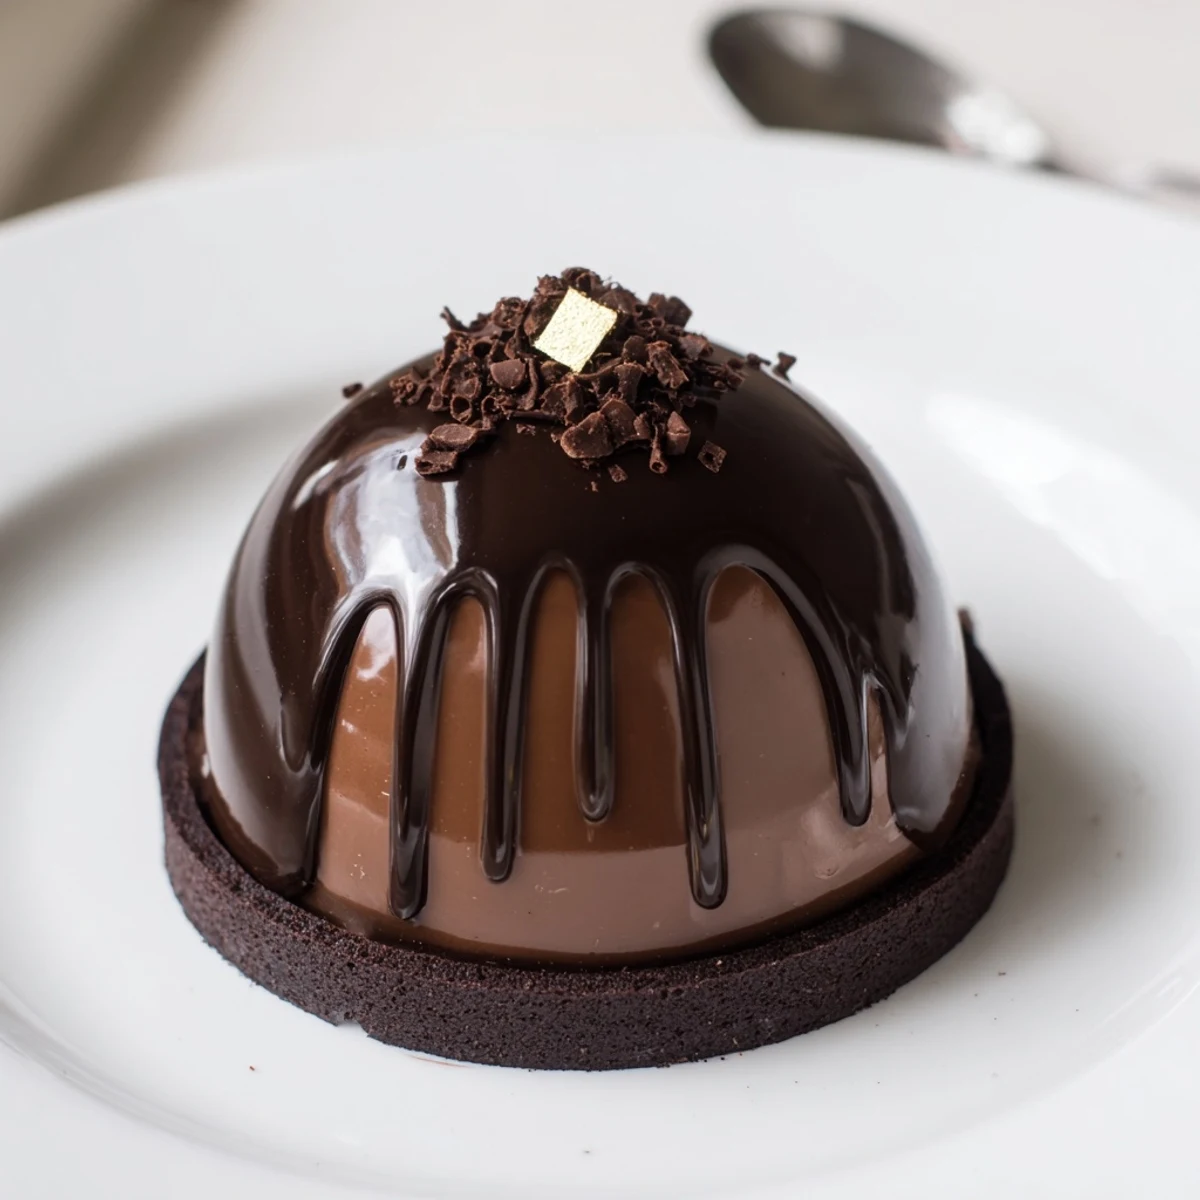
 Silky mascarpone mousse is created by folding whipped cream into mascarpone, sweetening and stabilizing with softened gelatin, then spooned or piped into chilled dark chocolate domes. Chocolate shells are formed by coating silicone molds with melted dark chocolate and chilling until sturdy. A warm chocolate mirror glaze is poured at about 32°C for a glossy finish; chill to set and finish with gold leaf or fresh berries before serving slightly chilled.
Glistening domes of chocolate have a sort of stage-presence in the dining room: this was the dessert that made my quiet winter get-together suddenly feel like an event. The kitchen that day hummed with low jazz and the scent of dark cocoa stretching toward the hallway. It’s a recipe I first tried for no reason at all — except, maybe, to see if I really had the nerve and patience to pull off something this dramatic. Spoiler: the glossy finish is worth every minute of suspense.
One evening last spring, I set these domes before my closest friends — the silence was almost reverent until someone tapped the shell and giggled at the perfect crack. For a brief moment we all forgot our daily worries, united by spoonfuls of glossy chocolate and creamy filling. I still laugh thinking of the way we discussed the glaze like it was the night’s main drama. There was just something satisfying about watching everyone’s eyes go wide with that first taste.
Ingredients
- Dark chocolate (at least 60% cocoa), 250 g: Rich, bitter undertones make the shell unforgettably grown-up — make sure it’s chopped finely so it melts with no lumps.
- Mascarpone cheese, 250 g: Smooth and tangy, it’s best used straight from the fridge for stability in the mousse.
- Heavy cream, 250 ml + 60 ml: Cold cream whips fastest, so chill your bowl and whisk for pillowy peaks every time.
- Powdered sugar, 50 g: Sifts right in for a gentle sweetness — I learned clumps will ruin that silky mousse, so sift first.
- Vanilla bean paste or extract, 1 tsp: The tiny flecks of bean feel like a mini luxury; both work for depth.
- Gelatin (2 sheets or 7 g powdered + 2 tbsp cold water): Gives the mousse its sliceable set — just don’t rush blooming times.
- Water, 100 ml + 3 tbsp: Needed twice: first for your mirror glaze, and again to bloom the gelatin.
- Sugar, 100 g: Adds sweetness to the glaze — don’t substitute with honey, it changes the texture.
- Cocoa powder, 30 g, sifted: Go for high quality unsweetened cocoa, and never skip sifting for the glossiest finish.
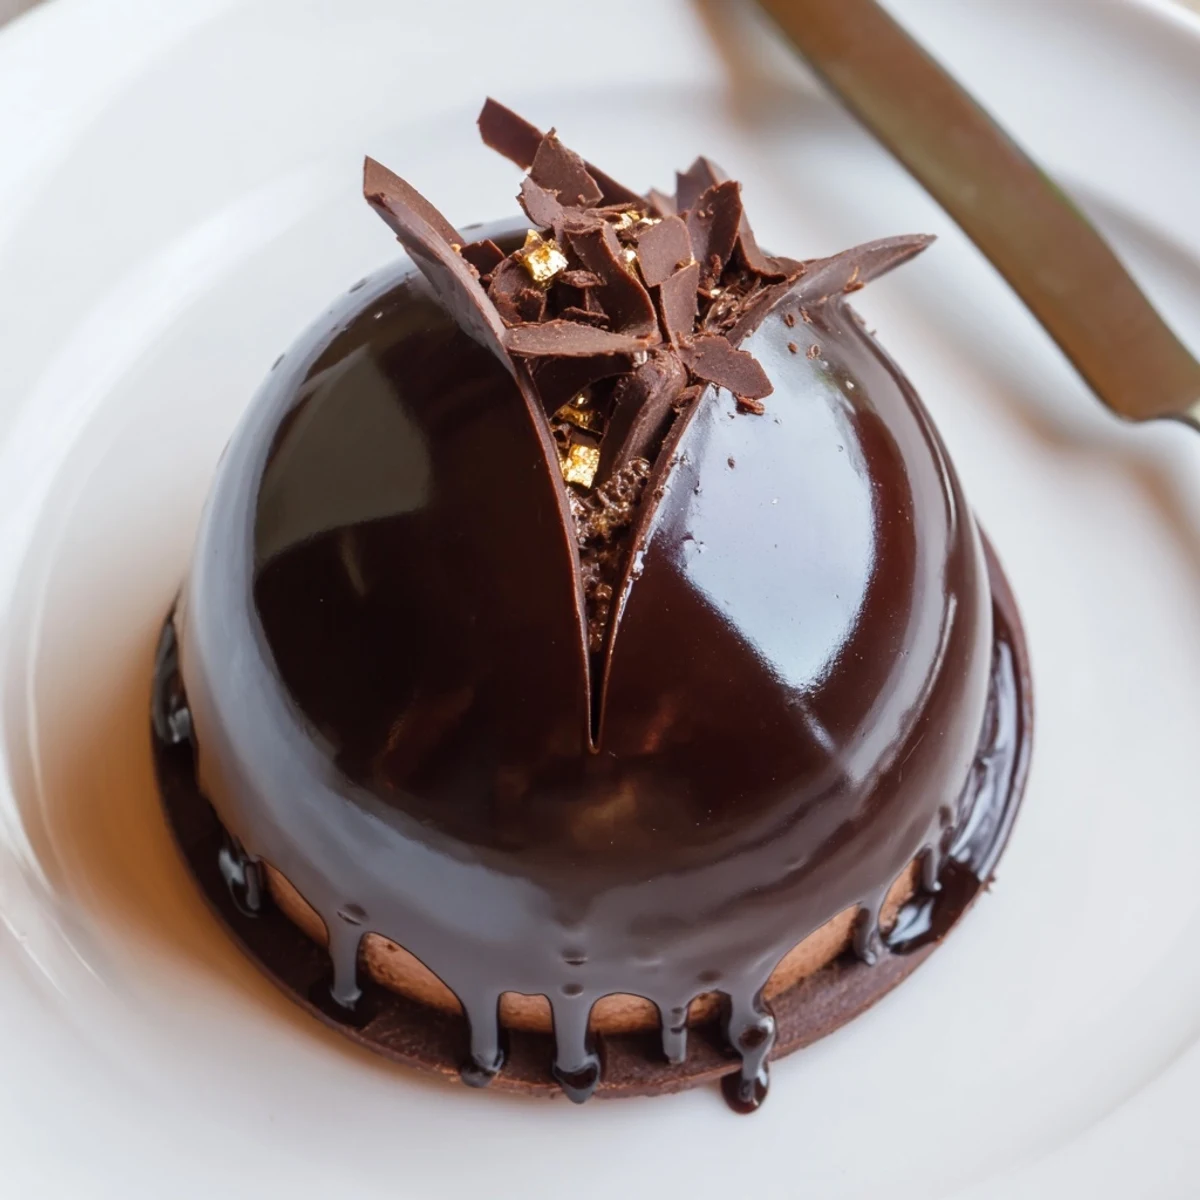
- Gold leaf, chocolate curls, fresh berries (optional): Adds a luxe (or playful) touch on top — I discovered gold leaf makes guests gasp every time.
Instructions
- Make the Chocolate Shells:
- Melt your chopped chocolate gently until smooth, either over simmering water or in the microwave on low power — the kitchen fills with a warm, cocoa aroma. Paint a good layer inside each dome of your silicone molds, chill, and repeat for sturdy shells; hearing the chocolate set with a tiny snap is always oddly satisfying.
- Whip Up the Mascarpone Mousse:
- Bloom your gelatin (sheets in cold water or powder in 2 tbsp water) for a few minutes till wobbly. Whisk mascarpone, powdered sugar, and vanilla in a bowl, then fold in whipped cream — your arm will thank you for going gently — and finally fold in the melted gelatin before smoothing the mousse into your waiting shells.
- Chill and Set:
- Tuck the filled molds into the fridge for at least three luxurious hours; it’s best not to peek, even if you’re tempted.
- Unmold and Ready the Domes:
- With a deep breath, peel back the molds and set the chilled domes on a wire rack — mine always feel like little chocolate moons at this stage.
- Prepare the Mirror Glaze:
- Bloom your gelatin in water while simmering water, sugar, cream, and cocoa; whisk till shimmering and velvety. Cool a bit, stir in the softened gelatin until dissolved, and wait for the temperature to drop so the glaze pours but doesn’t run thin.
- Glaze and Decorate:
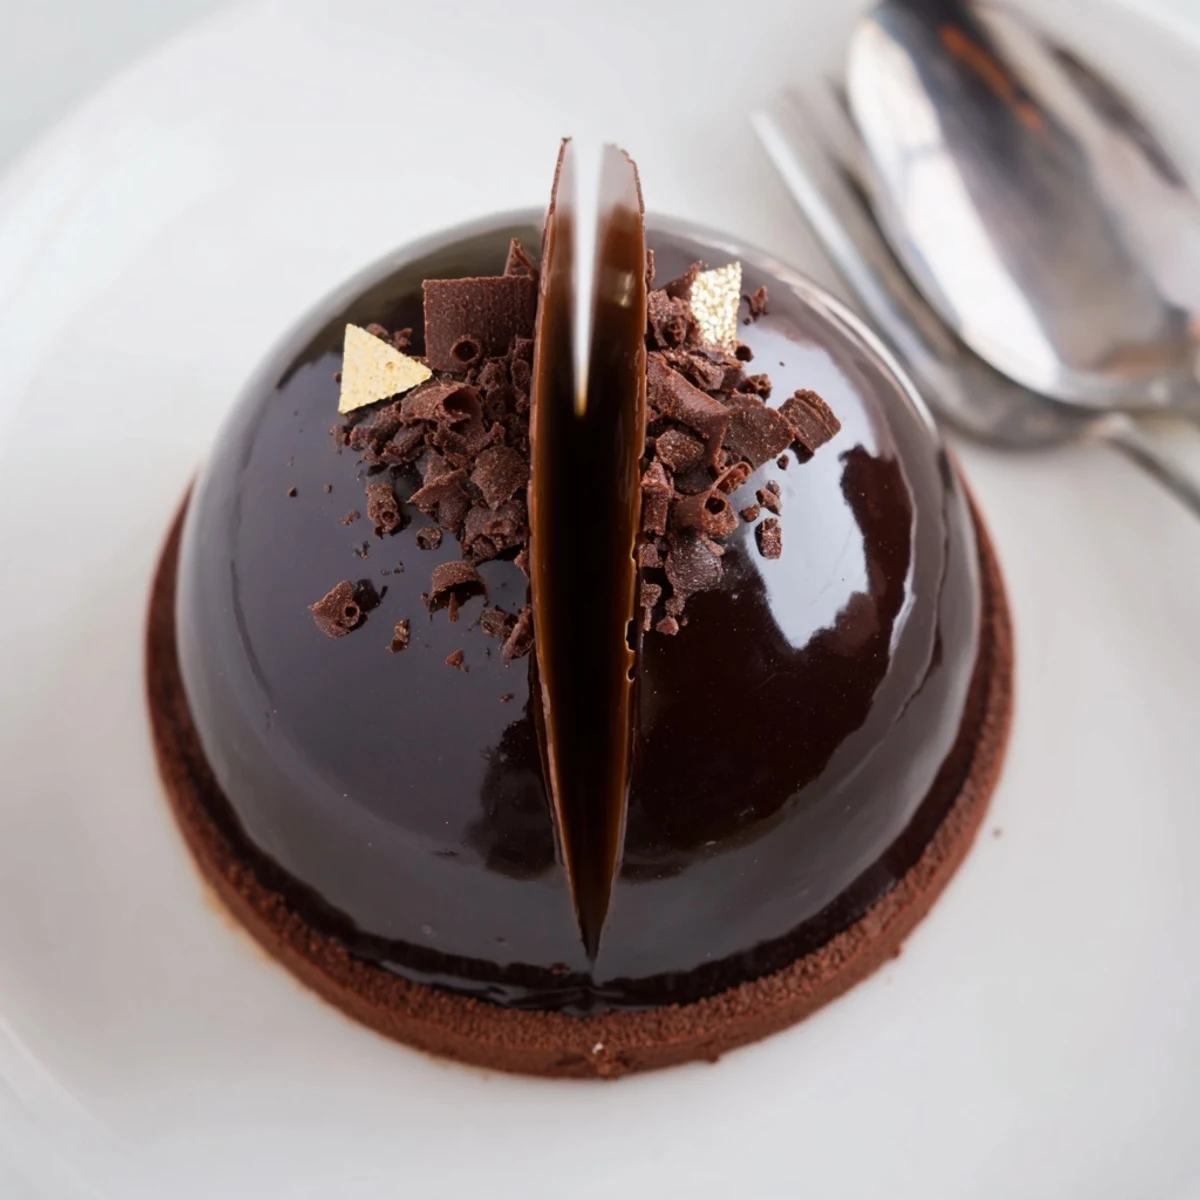
- Pour the glossy glaze generously over each dome and watch it cascade down — this is the dramatic final act. Quickly add decorations if you like, then chill again to set before serving on crisp white plates or alongside espresso.
 Save to Pinterest
 I’ll never forget my nephew’s look of awe when he first spotted these domes at a birthday dinner. Suddenly dessert felt more like opening a secret present than the end of a meal. Even the adults lined up for a photo before daring to take a bite.
Mastering the Chocolate Shells
The first time I tried, my chocolate seized because I got impatient with the microwave — now I use a bowl over hot water, letting the steam do the work slowly. I also found that giving the molds a quick polish with a soft cloth before adding chocolate ensures the shells emerge shiny and easier to release. The bonus is the faint scent of chocolate that hangs in the air even after you close the fridge.
Mascarpone Mousse Tips from the Trenches
Cold ingredients, a wide bowl, and a gentle hand are non-negotiable here. If you over-whip the cream or stir with too much gusto, the mousse can end up grainy instead of cloud-like. Folding feels slow, but the payoff is a mousse that billows under your spoon and holds its own against the rich chocolate shell.
The Glaze: Glossy Drama Every Time
I used to get nervous about the glaze, but now I trust my thermometer and give the pot gentle swirls while simmering. The moment it hits the right temperature, it moves like molten silk across the domes. Don’t worry if a little bit pools at the base — that’s how you know it’s thick enough.
- Have all your decorations ready before glazing, because the finish sets fast.
- If you see bubbles, pop them gently with a toothpick right away.
- Always glaze on a wire rack so the excess drips cleanly away, not onto your dessert plates.
 Save to Pinterest
 No fancy French patisserie training needed — if you pick one decadent project this month, let it be these domes. They’re pure edible theater, and sharing the final reveal is always a moment worth savoring.
Your Recipe Questions Answered
- → How do I get a sturdy chocolate shell?
-
Use high-quality dark chocolate with at least 60% cocoa, spread two or three even layers in silicone molds, chilling between coats. Ensure the first layer sets fully to avoid thin spots, and keep the shells cold while filling.
- → What is the ideal temperature to pour the mirror glaze?
-
Cool the glaze to roughly 30–33°C (86–91°F) before pouring. At that range it’s fluid enough to coat evenly yet cool enough to hold a glossy finish without melting the mousse.
- → Can I substitute gelatin for a vegetarian alternative?
-
Yes, agar-agar can work but it sets differently and may create a firmer texture; follow manufacturer instructions for substitution ratios and test a small batch to adjust for mouthfeel.
- → How should I unmold the domes without breaking them?
-
Gently invert chilled molds and press around edges to release. If shells stick, briefly warm the exterior with your hands or a warm towel to ease release, then transfer domes to a wire rack over a tray for glazing.
- → Can these be made ahead and how should they be stored?
-
They keep well refrigerated for 48 hours if glazed and stored in a covered container. For longer storage, keep unglazed filled shells chilled and glaze just before service to preserve shine.
- → Any tips for flavor variations?
-
Add a thin layer of coffee-soaked sponge at the base, fold citrus zest into the mousse, or use white chocolate shells and a berry glaze for contrast. Small changes enhance balance without altering technique.
