 Save to Pinterest
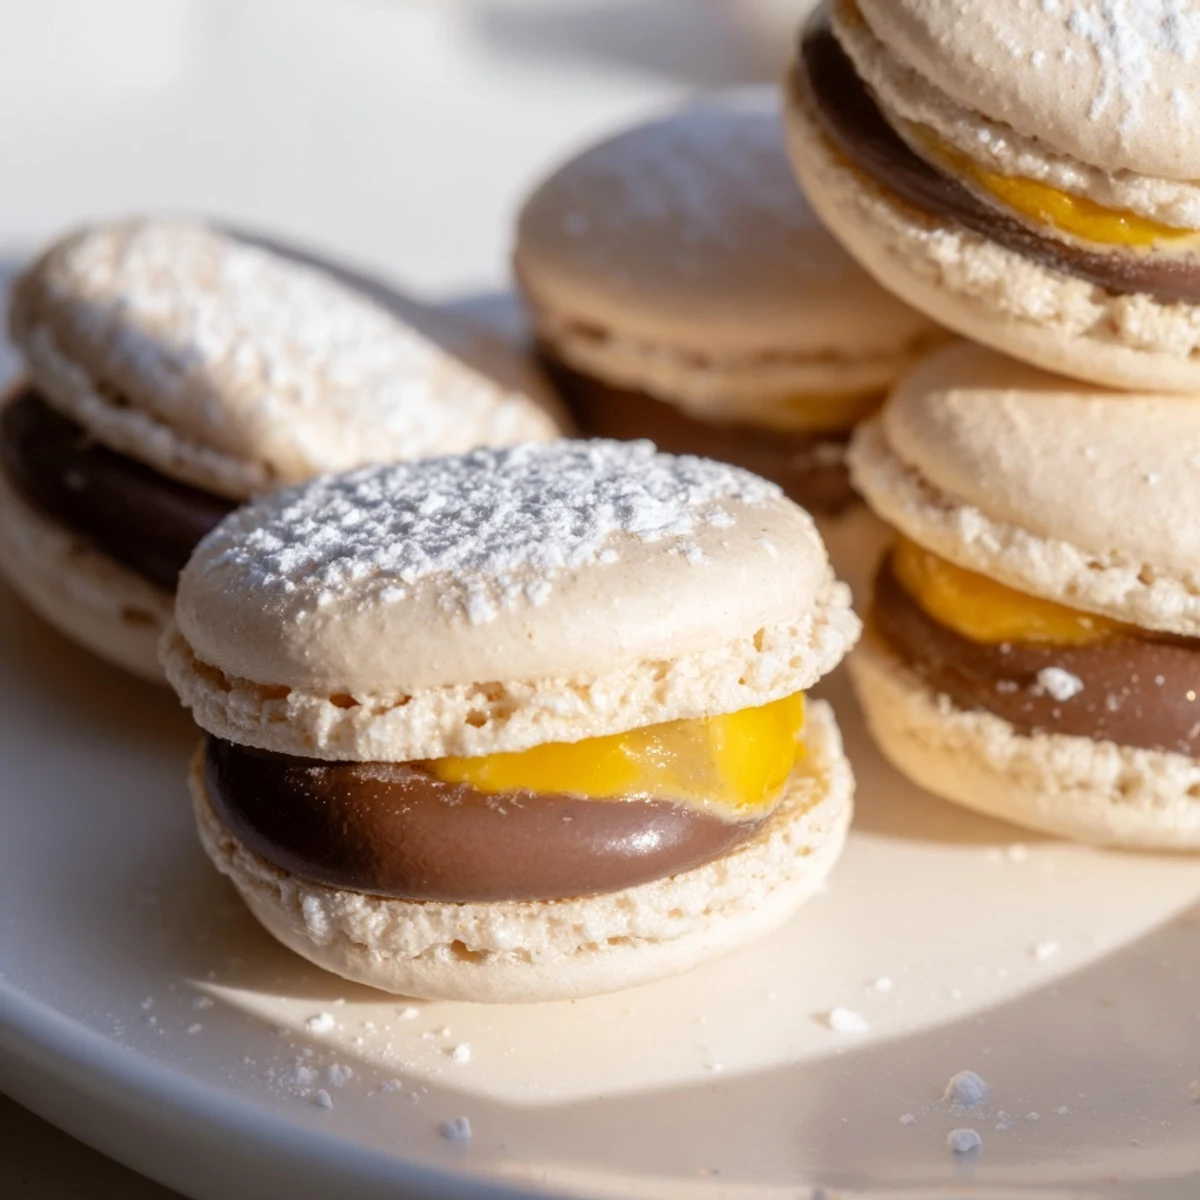
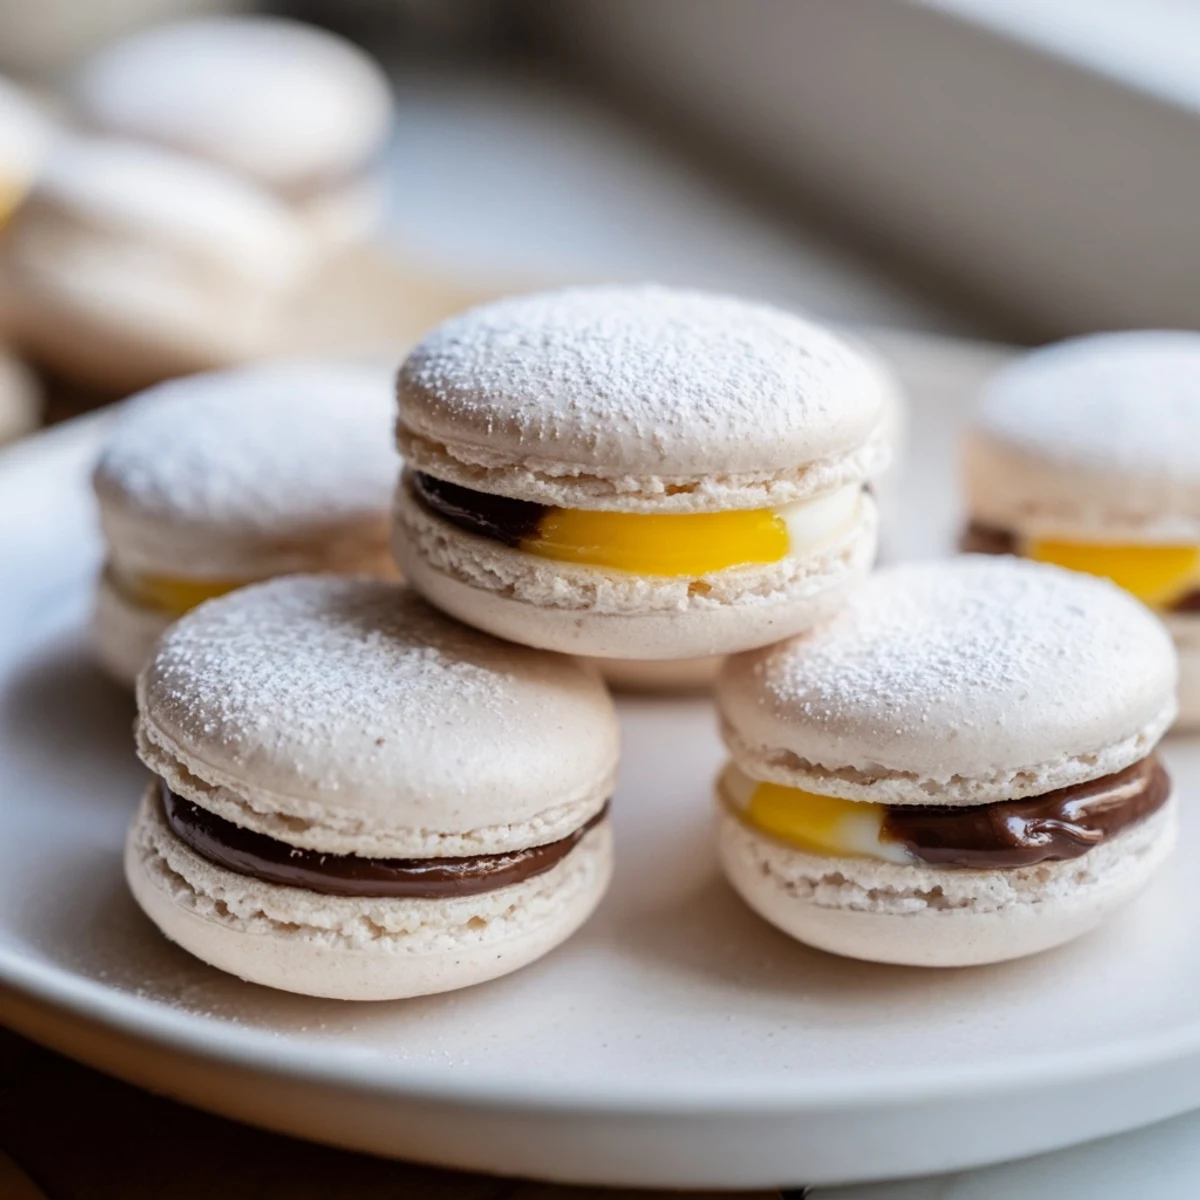
 These elegant French confections combine delicate almond meringue shells with a rich milk chocolate ganache filling inspired by classic Cadbury Creme Eggs. The process involves creating crisp, footed macaron shells tinted in pastel shades, then sandwiching them with a glossy chocolate ganache. A portion of the filling is colored yellow to recreate the iconic "yolk" effect that makes these treats instantly recognizable.
The technique requires proper macaronage—the precise folding method that achieves the perfect ribbon consistency—and adequate resting time to develop the characteristic smooth tops. While the process demands patience and attention to detail, the result produces sixteen stunning confections that capture the nostalgic flavors of a beloved Easter candy in a sophisticated French pastry format.
For optimal flavor and texture, these treats should mature overnight in an airtight container, allowing the filling to soften the shells slightly and creating that coveted melt-in-your-mouth experience.
My sister dared me to recreate the magic of Cadbury Creme Eggs in macaron form one Easter, and honestly, I laughed at first. But then I got obsessed with getting that iconic gooey center right. After three attempts that left chocolate fingerprints everywhere, I finally nailed the perfect balance of delicate shell and surprise filling.
Last spring I brought a batch to our neighborhood Easter potluck, and watched my friend Julie's eyes widen when she bit into that first one. She made me write down the recipe right there on a paper napkin. Now she makes them every year and claims I ruined store-bought macarons for her forever.
Ingredients
- 100 g almond flour: Sift this thoroughly to avoid lumpy shells, fine grind makes all the difference
- 100 g powdered sugar: Helps create that signature smooth macaron surface we all want
- 90 g egg whites: Room temperature is crucial here, cold whites simply will not whip properly
- 90 g granulated sugar: Add gradually while beating to build stable meringue that holds its shape
- 1/4 tsp cream of tartar: This tiny amount stabilizes your egg whites like magic
- Food coloring: Yellow gel mimics the yolk beautifully, pastel shells make Easter mornings special
- 100 g milk chocolate: Cadbury Dairy Milk gives the most authentic nostalgic flavor
- 50 ml heavy cream: Warm this just until it simmers, overheating ruins the ganache texture
- 3 tbsp golden syrup: The secret to that gooey fondant consistency we love
- 50 g unsalted butter: Room temperature butter blends into the filling without lumps
- Yellow gel food coloring: A tiny drop transforms plain filling into that iconic yolk center
Instructions
- Prepare your baking station:
- Line two baking sheets with parchment paper or silicone mats and fit a pastry bag with a half-inch round tip before starting anything else.
- Sift the dry ingredients:
- Combine almond flour and powdered sugar in a bowl and sift thoroughly at least twice to ensure smooth lump-free shells.
- Whip the meringue:
- In a completely clean dry bowl beat egg whites with cream of tartar until soft peaks form then gradually add granulated sugar whipping to glossy stiff peaks.
- Master the macaronage:
- Gently fold the almond mixture into the meringue in three additions mixing until the batter flows in thick ribbons that disappear back into themselves within thirty seconds.
- Pipe perfect rounds:
- Transfer batter to your prepared pastry bag and pipe thirty two one and a half inch rounds onto the baking sheets holding the bag vertically.
- Rest the shells:
- Firmly tap the baking sheets against the counter to release trapped air bubbles then let the shells rest for thirty to sixty minutes until the surface is completely dry to the touch.
- Bake to perfection:
- Preheat your oven to 150°C and bake for thirteen to fifteen minutes rotating the pans halfway through the shells are done when they lift easily off the mat.
- Make the chocolate ganache:
- Heat the heavy cream until just simmering pour over the chopped milk chocolate let sit for two minutes then stir until completely smooth and glossy.
- Create the yolk filling:
- Stir the golden syrup and softened butter into the chocolate mixture then divide out a quarter of the filling and tint it with yellow gel coloring.
- Chill the fillings:
- Place both the chocolate and yellow fillings in the refrigerator until thickened to pipeable consistency about thirty minutes.
- Assemble your masterpieces:
- Pipe a ring of chocolate filling onto one shell add a small dollop of yellow filling in the center then gently press another shell on top.
- Let them mature:
- Store the assembled macarons in an airtight container overnight at room temperature to allow the flavors to develop and the shells to soften slightly.
 Save to Pinterest
 My daughter now asks for these instead of traditional Easter eggs, and watching her carefully choose which pastel color to eat first has become our favorite holiday morning tradition. Something about biting into that surprise yolk center never gets old.
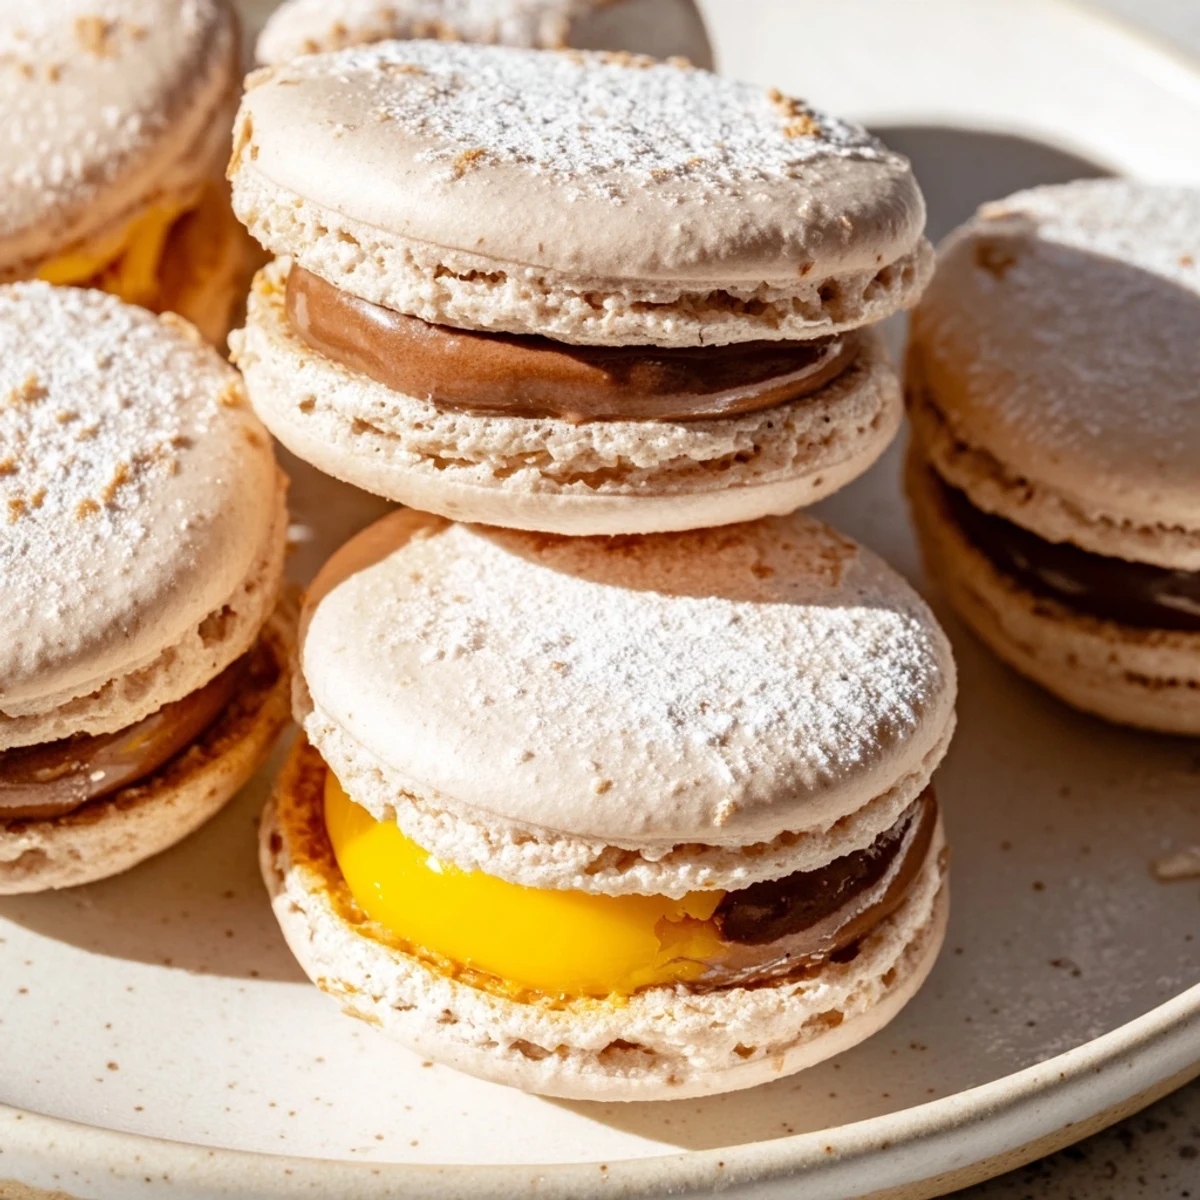
Getting That Perfect Macaron Feet
The little ruffled frill at the bottom of each shell is what separates good macarons from great ones. I learned through countless batches that this depends entirely on proper resting time and accurate oven temperature. An oven thermometer is worth every penny since most home ovens run at least ten degrees off the dial setting.
Filling Consistency Secrets
The ganache needs to be thick enough to hold its shape but soft enough to squish slightly when you bite down. I discovered that chilling the filling in the refrigerator for exactly thirty minutes gives the perfect pipeable texture. If it is too firm the shells slide around and if too soft it oozes out the sides.
Storage And Serving Tips
These macarons actually improve after twenty four hours as the filling softens the shell just slightly creating that perfect chewy texture. They can be refrigerated for up to five days but bring them to room temperature for twenty minutes before serving for the best experience.
- Stack them carefully with parchment paper between layers in your container
- Avoid storing near strong odors as the shells absorb flavors easily
- Freeze unfilled shells for up to three months if you want to prepare ahead
 Save to Pinterest
 There is something magical about taking the first bite of these and tasting childhood Easter memories in such an elegant form. Happy baking and may your kitchen be filled with chocolate fingerprints and happy moments.
Your Recipe Questions Answered
- → What makes these macarons inspired by Cadbury Creme Eggs?
-
The filling recreates the classic Cadbury Creme Egg experience with a rich milk chocolate ganache exterior and a sweet yellow-colored center that mimics the iconic "yolk." When you bite into them, you get that nostalgic combination of creamy chocolate and vanilla sweetness that defines the original candy.
- → Why do macaron shells need to rest before baking?
-
The resting period allows a skin to form on the surface of the piped shells, which is essential for proper rising and developing the characteristic "feet" during baking. This usually takes 30–60 minutes at room temperature until the surface feels dry and no longer sticky to the touch.
- → Can I make these without a stand mixer?
-
Yes, an electric hand mixer works perfectly for whipping the meringue. The key is ensuring your bowl and whisk are completely clean and dry, and that you whip the egg whites to stiff, glossy peaks before gently folding in the almond flour mixture.
- → How long do these macarons stay fresh?
-
Properly stored in an airtight container in the refrigerator, these will maintain their quality for up to 5 days. For the best texture and flavor experience, allow them to mature overnight at room temperature before serving—this resting period lets the filling soften the shells slightly.
- → What's the best chocolate to use for authentic flavor?
-
Cadbury Dairy Milk chocolate provides the most authentic flavor profile since these are inspired by their classic Creme Eggs. However, any quality milk chocolate with around 30% cocoa content will work well and create a deliciously creamy ganache filling.
- → Why is my macaron batter not forming proper feet?
-
This usually comes down to under-mixed or over-mixed batter, insufficient resting time, or oven temperature issues. The batter should flow in thick ribbons when lifted—too stiff and feet won't form properly, too thin and they'll spread flat. An oven thermometer helps ensure accurate temperature.
